|
|
Post by martin42006 on Aug 9, 2018 21:07:43 GMT
November 28th 2016 Are you all fed up of looking at rust yet? I know i am, i think im starting to go rusty myself :blink: it must be contagious. This is the sill before we begin, 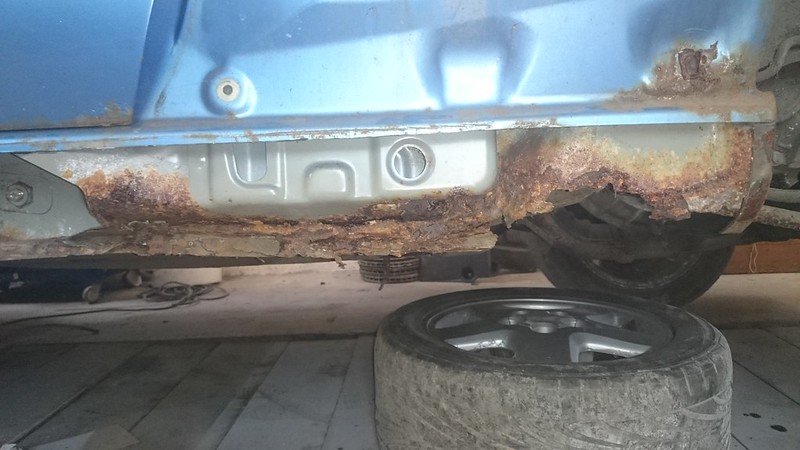 Thats not to bad choppy choppy 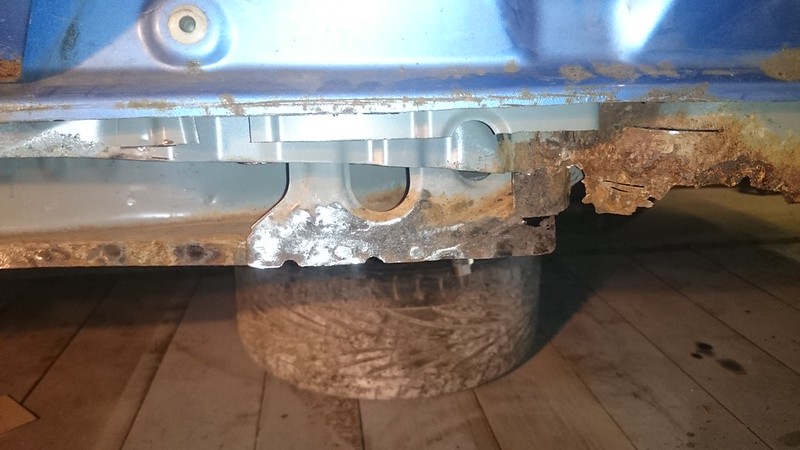 The reason i think its so good is that im comparing it to the drivers side which was so much worse. First piece made: 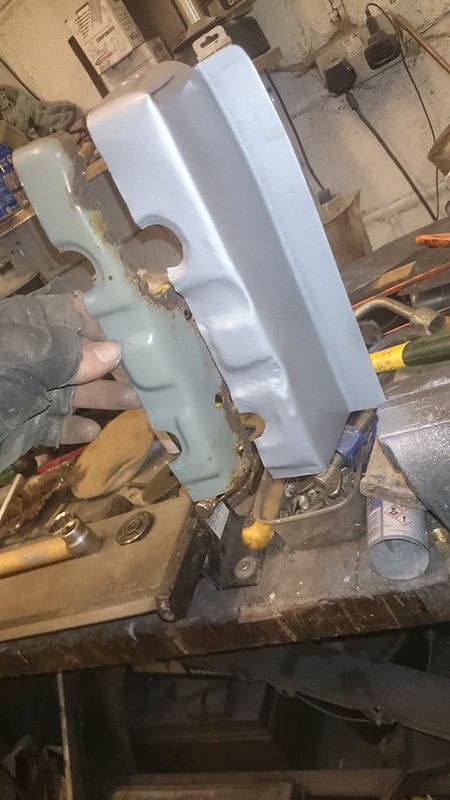 Not to blow my own trumpet but *toot toot* im rather proud of that one. second piece: 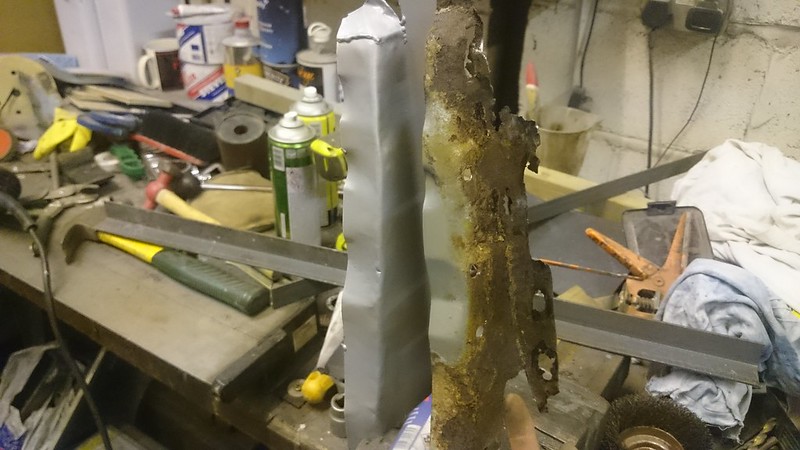 Bam they are in. 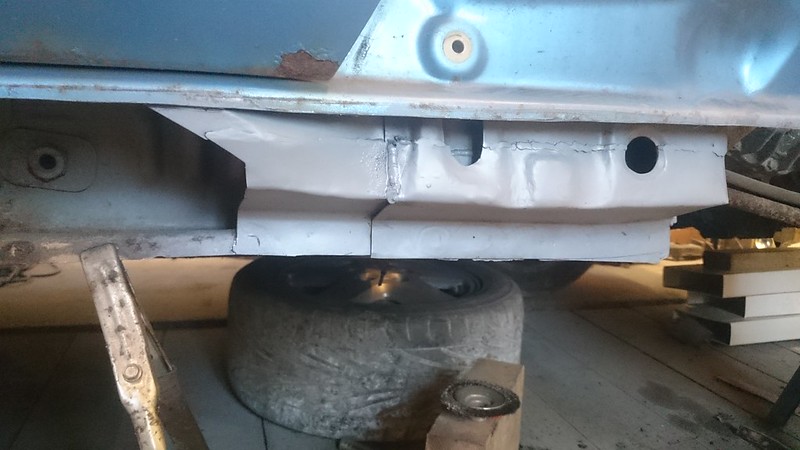 Now then whats the front end like? 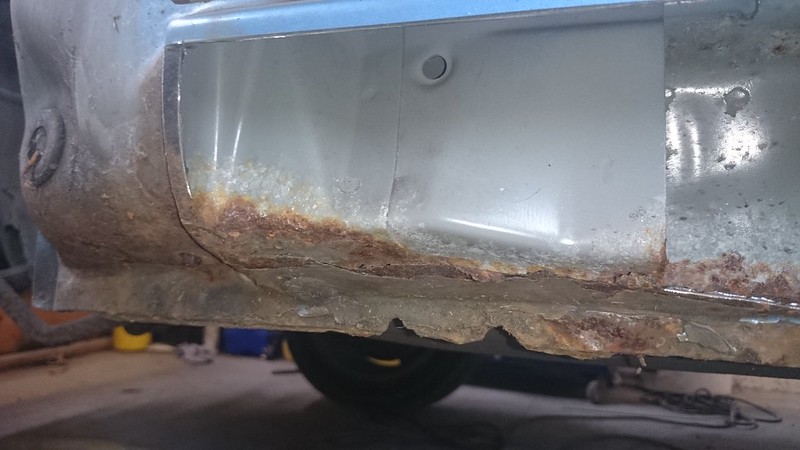 hmmm, not much better. Out it comes 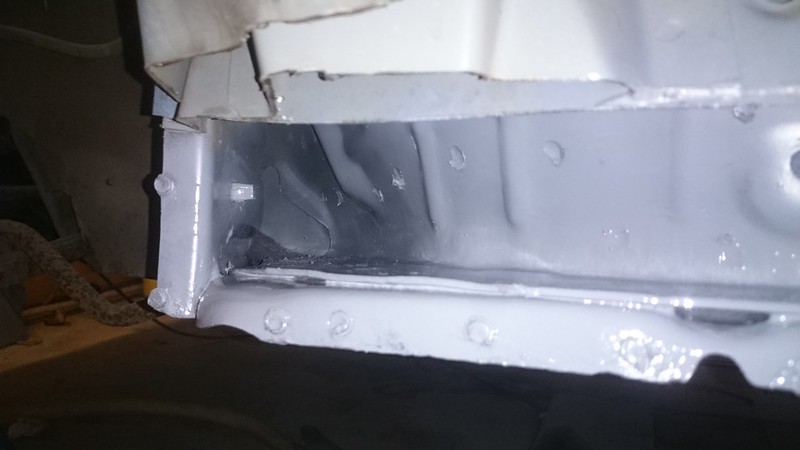 I forgot to take before photos but it was rather clean so i scrubbed all surface rust off and covered it in rust inhibitor along with the rest of the sill. 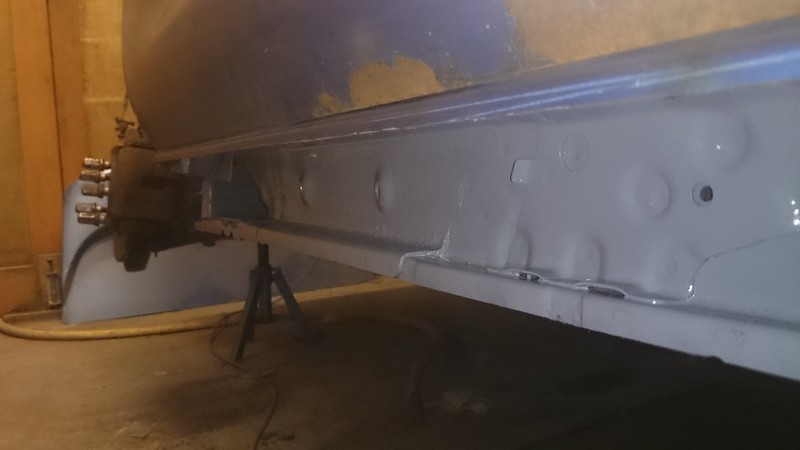 It will get some Hammerite and waxoyl aswell just to be sure. One inner front panel was still more than solid enough to salvage 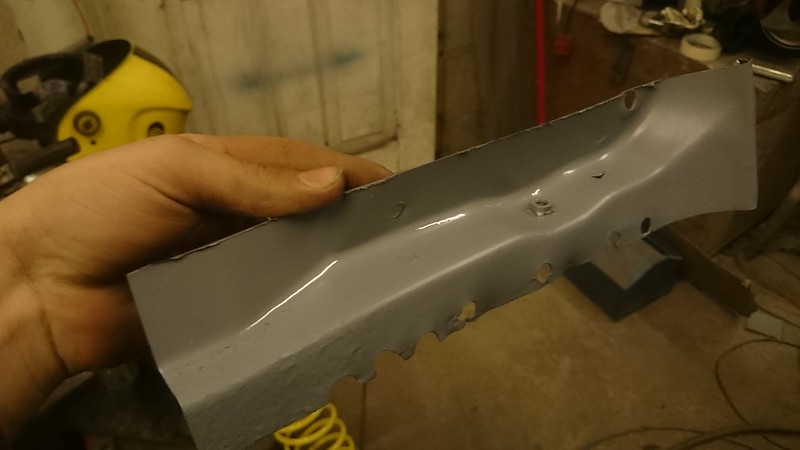 The other one will need a bit of rescue work but not to much. |
|
|
|
Post by martin42006 on Aug 9, 2018 21:07:56 GMT
December 05th 2016 The original plan was to rebuild the car and then drive it for a while before selling it on but the more i do the less im wanting to have to sell it, besides i have lost so much blood and skin to this car so far that its almost a part of me. Lets get back to it. This weekend didnt see much get done but i will show what I've got. The front end needed a little bit of work doing on the second inner panel as it was just a little to thin for me to be happy welding back on. So the lower lip got rebuild with a piece of 2mm steel, yes 2mm because thats what came out. 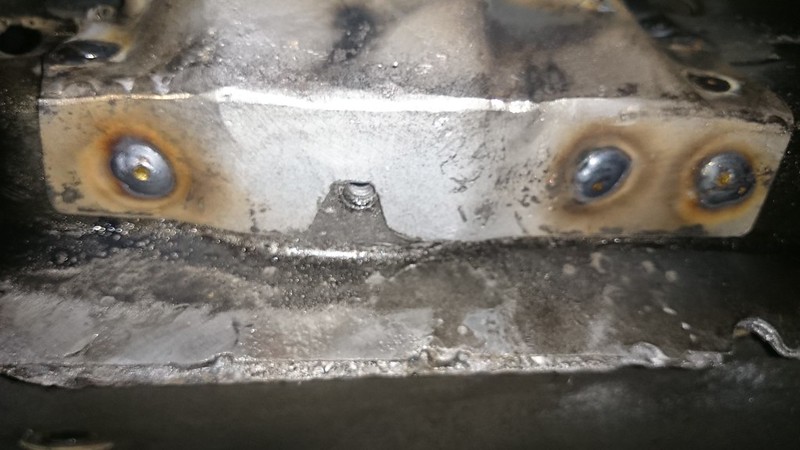 Before i welded anything on i Hammerited the inner sills.  Then the first piece went on 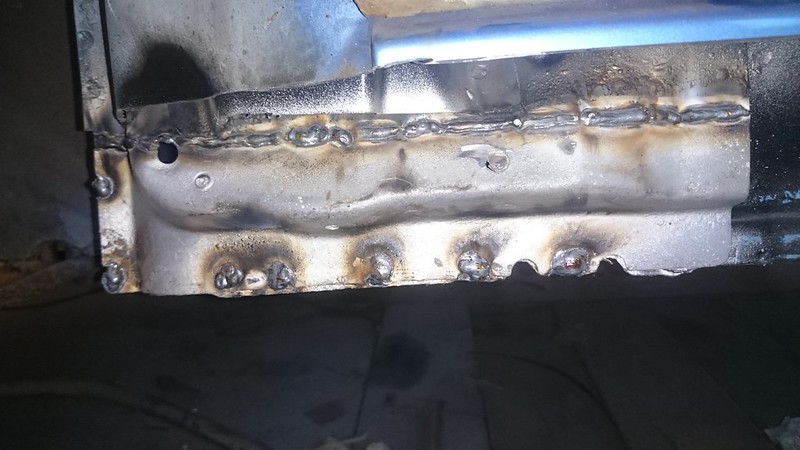 Shortly followed by the second piece. 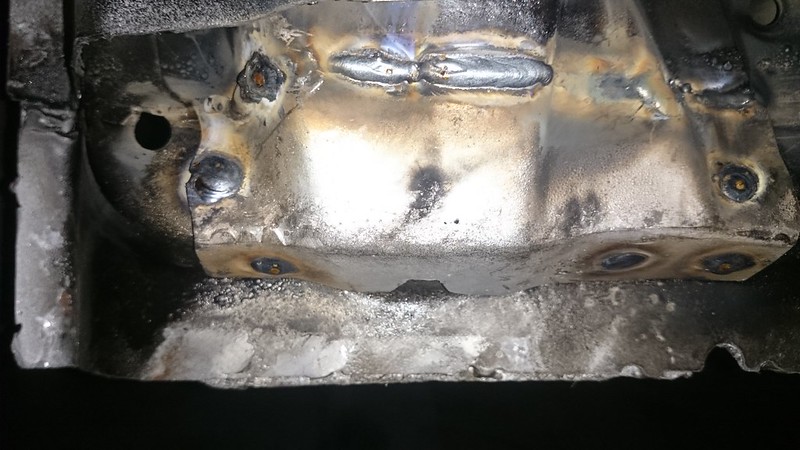 Anyway outer panel, it was a little rusty so that came out and the new piece got made.  Here you can see the holes in the original piece. its not welded on yet as i still have a little tweaking to do. Here comes the hard part which took many hours. Outer sill 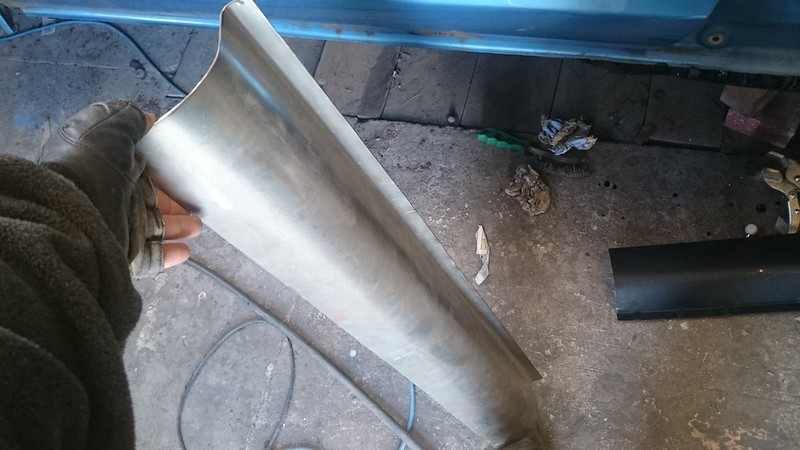 Now im sure there will be atleast one person who sees that and says: "why would it take so long to just curve a bit of steel" I know this because that what i thought before i started. Here is your reason, the steel in question is 1.5mm thick which is 50% thicker than the original panel. and here is reason 2: 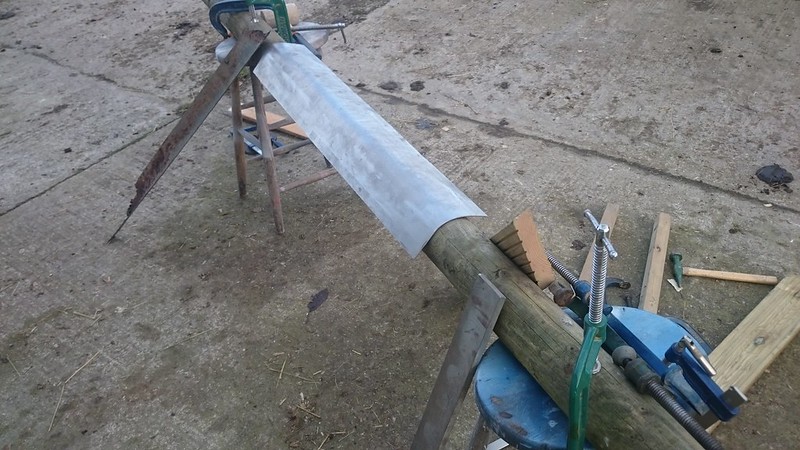 I dont have a proper steel bender. Im clamping it to a wooden post and pulling it round by hand with a steel rail to keep it flat, its rather hard work and my shoulders are aching today. If anyone is curious about the amount of time i have spent so far on this car then my answer is "I havnt got a smegging clue" i havnt kept track of time very well but i have gone through about 35 audio books so far whilst working on it. |
|
|
|
Post by byrney1984 on Aug 22, 2018 20:16:57 GMT
Fair do's pal that's some good fabrication work given you are only using what you have to hand as a stake/roller. I had to replace my passenger sill just before I did the na v6 swap. It was meant to be a quick 6" insert, whilst in work on nights. Hmmm more like the whole width of the door. My fault for leaving it so long and its hard to see because of my skirts. Although I used a roller and a sheet bender so it only took a couple of hours during breakdowns. But a good job well done by yourself. You'll never sell it because the car owns you haha
|
|
|
|
Post by martin42006 on Aug 23, 2018 11:58:42 GMT
Yep she thoroughly owns me by now, i originally thought i just had the sill ends to do aswell but its surprising how you just end up chopping out more and more. December 06th 2016 Quick mention, i also got a little reconnaissance mission done at the weekend. i mentioned before that i found a patch more rust, up here. 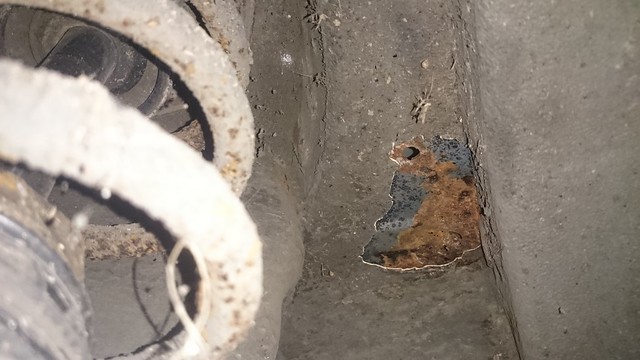 well this is the top 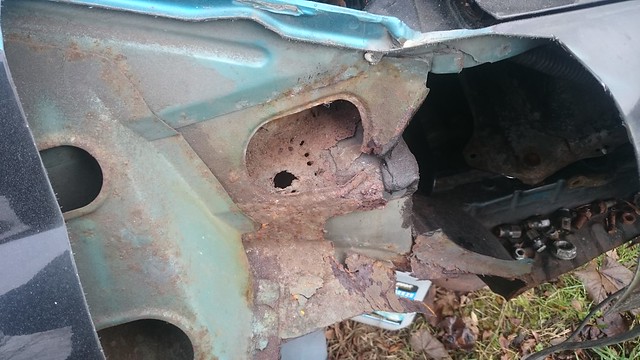 steady on now, dont freak out, thats on the donor. I chopped a section out of the donor cars rear quarter so i could see what im dealing with. As you can see it has gone considerably worse than mine, you can also see the dodgy repairs that have been done to try and hide oh so much rust. Other side, 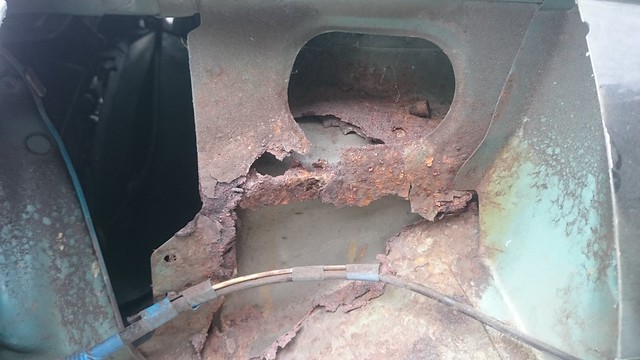 This is why the car has become a donor, way to much poor work to try and undo. This is the same area on mine. 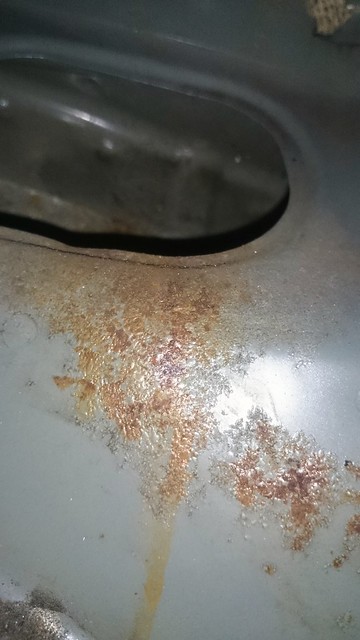 Sky is actually still solid for most of it i think just a little surface rust. |
|
|
|
Post by martin42006 on Aug 23, 2018 11:59:07 GMT
December 12th 2016 The work continues, If any off you are fed up with rebuilding sills then feel free to come back in a couple of weeks as i should be on something new by then, if your not fed up of looking at lacy sills then pfft.. i know i am. So last week i made the outer sills and was working on the front of the sills. The outer sills got a liberal coating of Hammerite on the inside 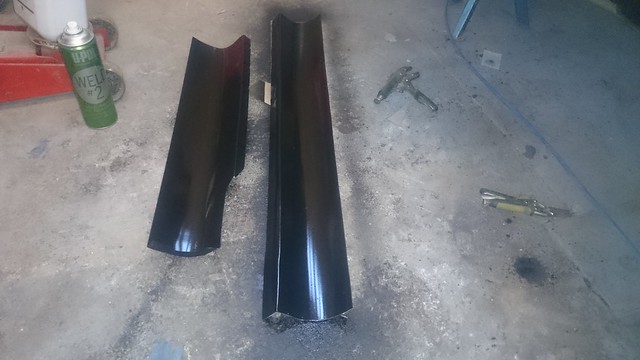 Then the first piece went on along with the front corner panel. 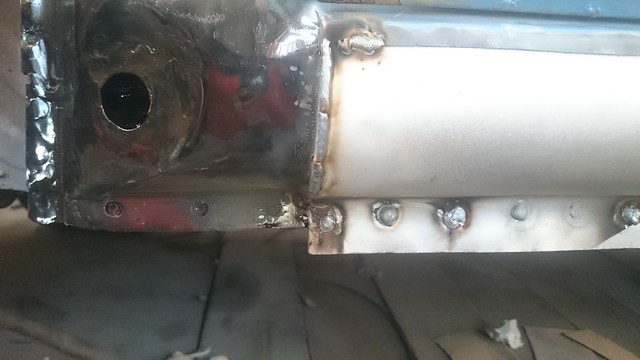 Next piece was the inner arch down to the sill which was a little awkward to make. 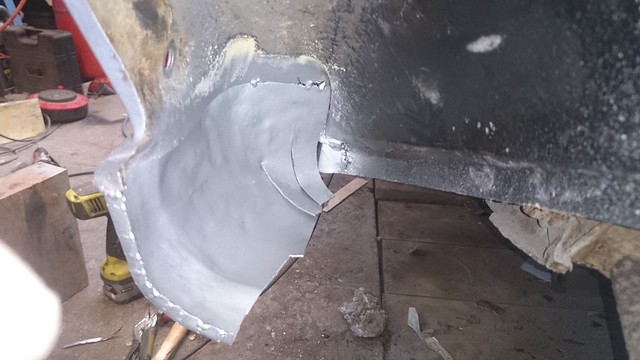 It has now been fully welded on and the bottom edge will need trimming to be inline with the outer sill. On goes the second outer sill panel. it was all going very well till i ran out of welding gas. 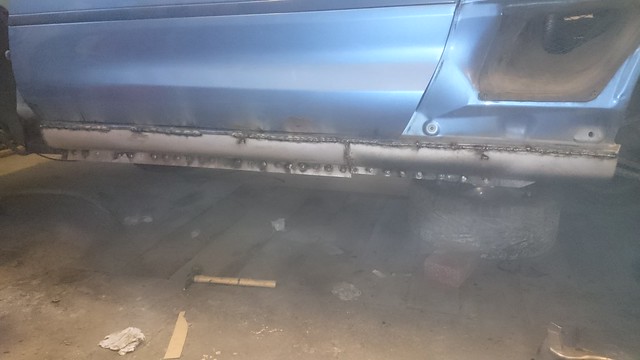 You can see where i ran out. Whilst the paint was drying i got cracking with the front reinforcement bar. 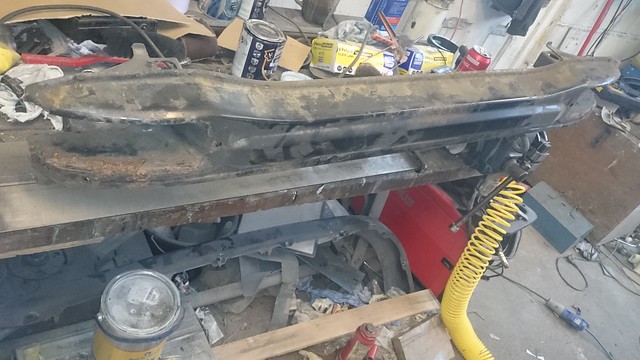 It was a little rusty but after a very thorough attack with a grinder and wire wheel it was all still solid so on goes the Hammerite 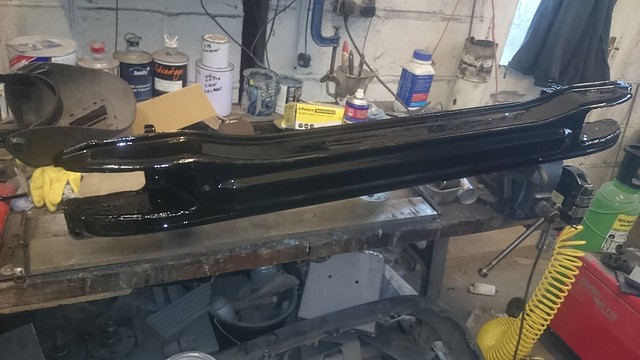 As you can see it is all going together but could be slow evening work as i have to get some welding gas. |
|
|
|
Post by martin42006 on Aug 23, 2018 22:18:38 GMT
December 19th 2016 Did some more shaping whilst i didnt have any welding gas. bottom of the arch piece cut to shape 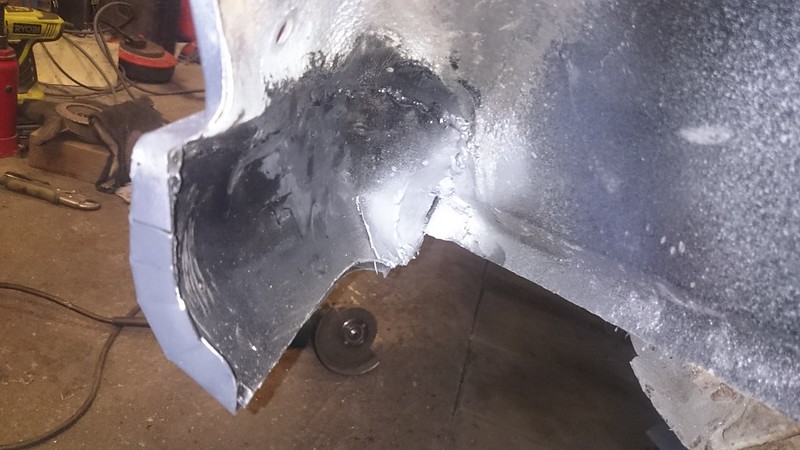 I also noticed there was a little bit of the inner arch that my replacement inner arch didnt reach to so out it comes.  Aaand you guessed it, new piece gets made 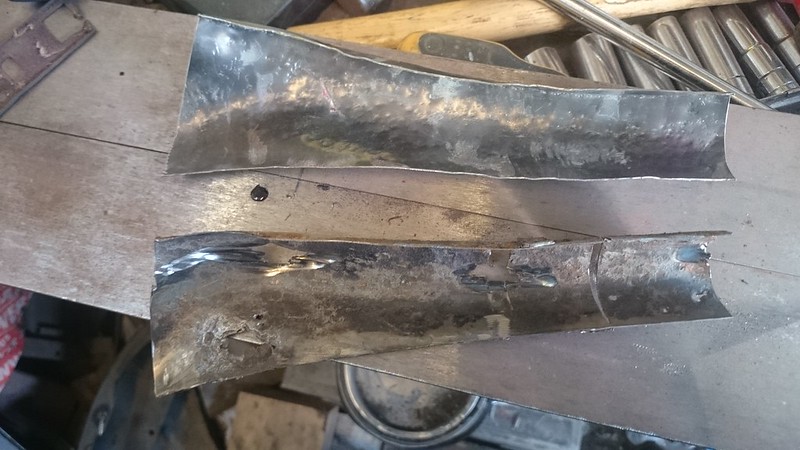 December 19th 2016 I think that was one of the harder pieces to make, everytime i shaped one part it distorted a different part. Got some welding gas now, many thanks to my Grandma  . So in it goes 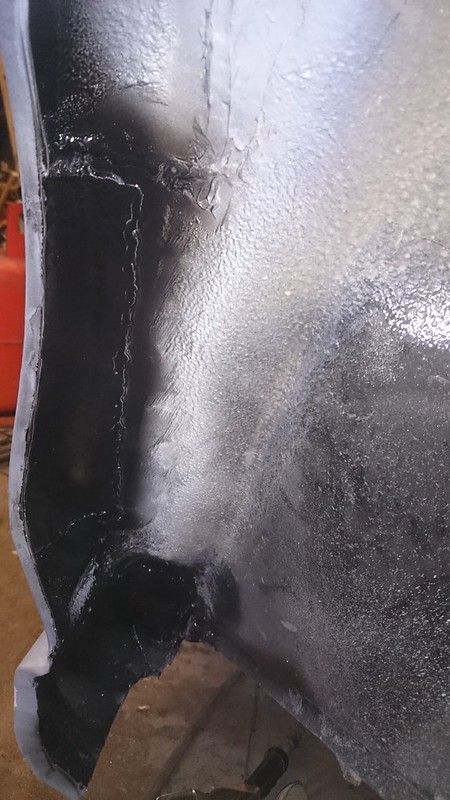 I also got the welding finished along the sill and ground back, then a thin layer of filler to hide the weld. 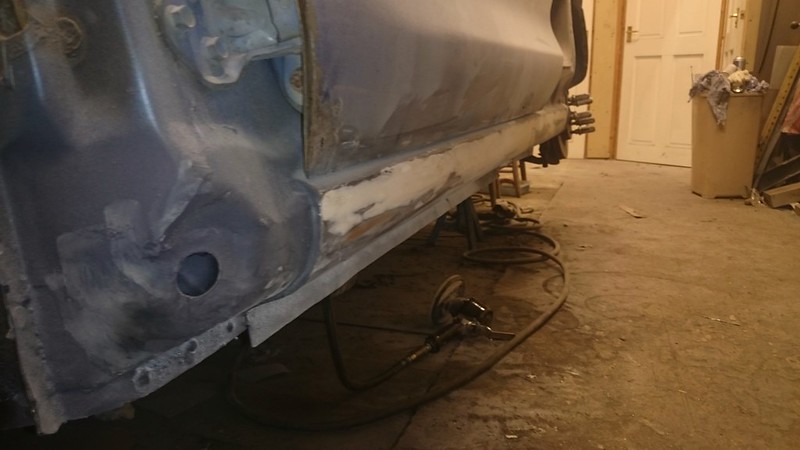 Since i dont like wasting time i got cracking with the front strut area whilst the filler was setting. Using a wire wheel on the grinder i cleaned back all the flaking undersealer and surface rust in a search for any holes, gladly there wasnt any so on goes the rust inhibitor along with some hammerite. 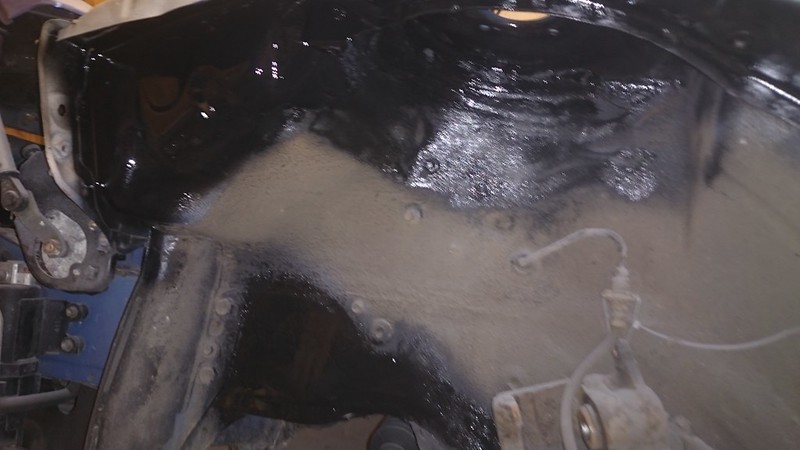 Now i have a small issue to address with the strut top It had gone rather to religious for me, haha get it? rather "holy" 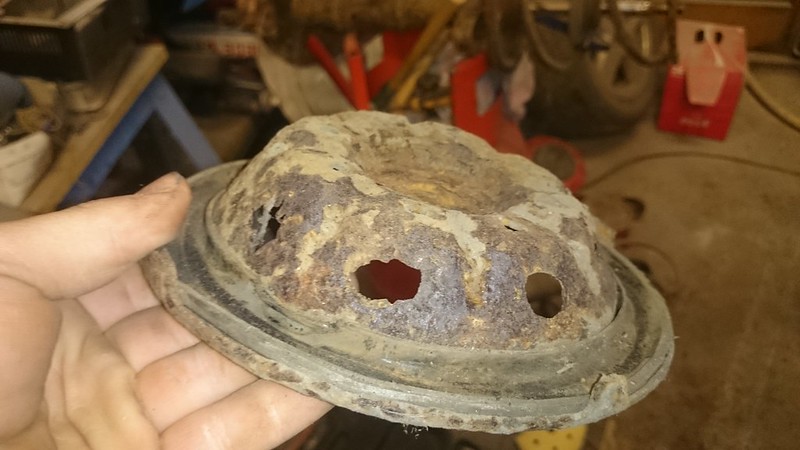 Replacement off the donor 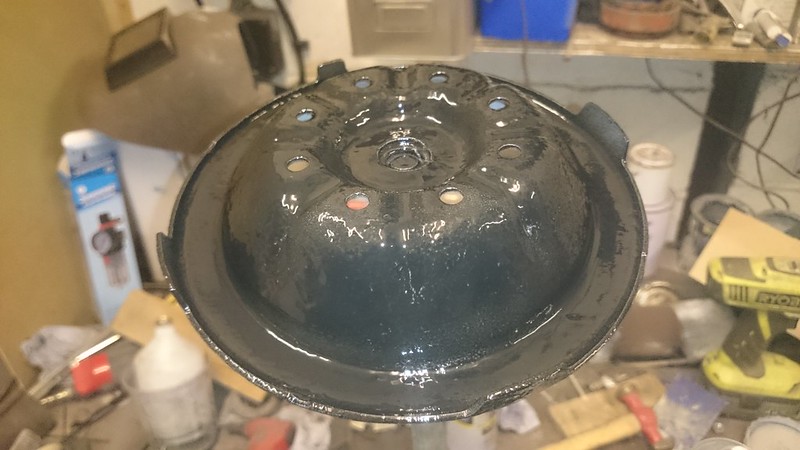 obviously thats after a clean and paint. Also gave the front suspension arms a spruce up. 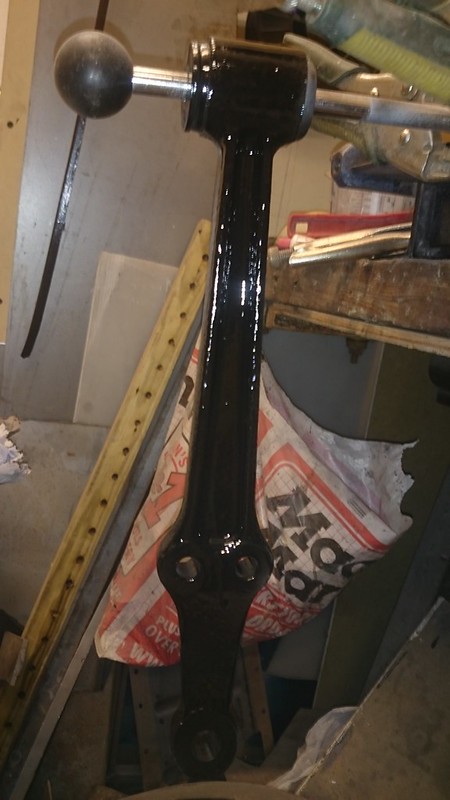 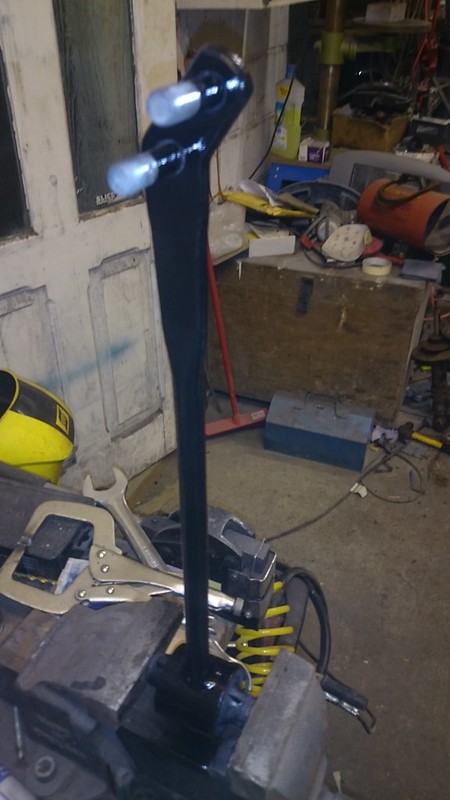 Whilst i was on with it i gave them a quick wiggle in the vice to check the bushes and they seem solid still so thats good. Now what do y'all think to this.  The one not on the strut came off the PS of the donor, the other one is the same as whats on the DS of the donor :w_tf: someone has fitted 2 different type of spring to the front suspension. :facepalm: Yes yes i know i shouldnt be using G-clamps on suspension coils but my spring compressor didnt fit and they arnt compressing it much. I doubt there will be another update before before next weekend so i will leave you good people to your Christmas prep. Merry Christmas and a Happy New Year :cheers: |
|
|
|
Post by martin42006 on Sept 13, 2018 19:59:35 GMT
A couple more posts, will get through them all eventually. January 3rd 2017 Did we all have a fruitful Christmas then? I spent most of it feeling ill but apart form that it was good. The spoils: Should be slightly better than the £30 one im currently using. 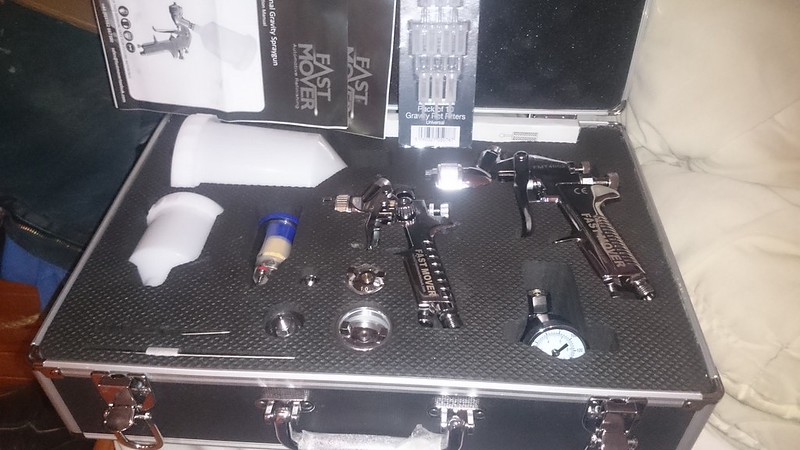 My sister knows me too well   Despite been ill and not wanting to spend hours sat on a cold concrete floor i did get a considerable amount done. Front strut area got undersealed then the strut went back together and in with a new ball joint as i dont know how old they are. 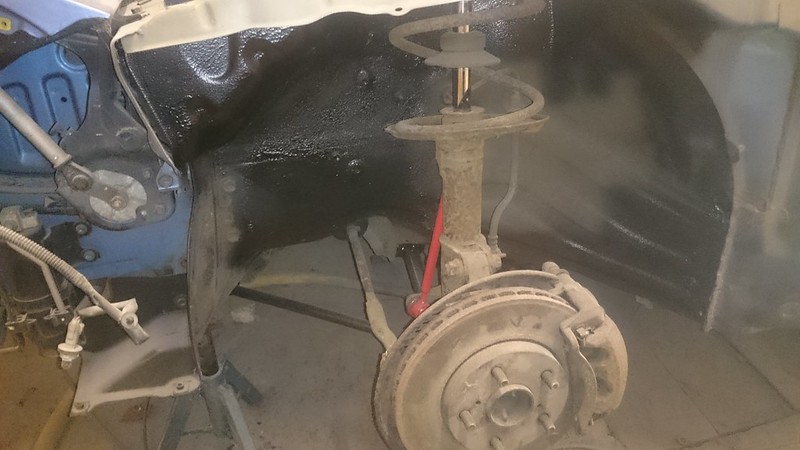 Another area of rust that i had mentioned before is where the rear strut housing connects to the inner arch so i got cracking with that. Trying to remove the rear strut was harder than expected 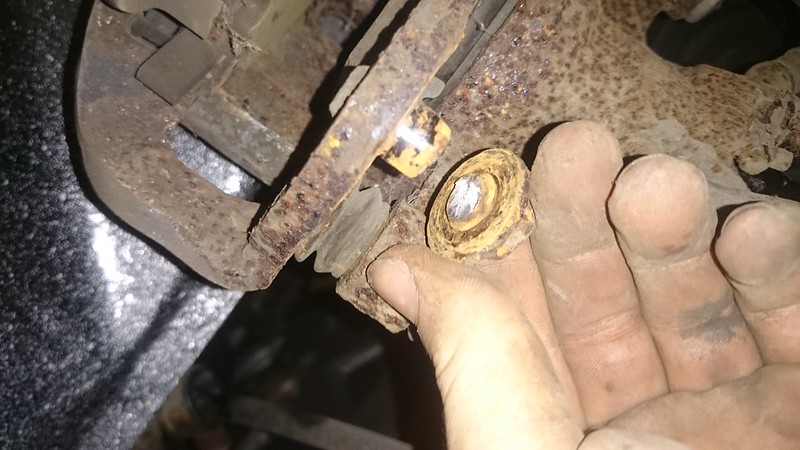 Will need a new one of them :ranting1: I may or may not have bought myself a couple of new toys. 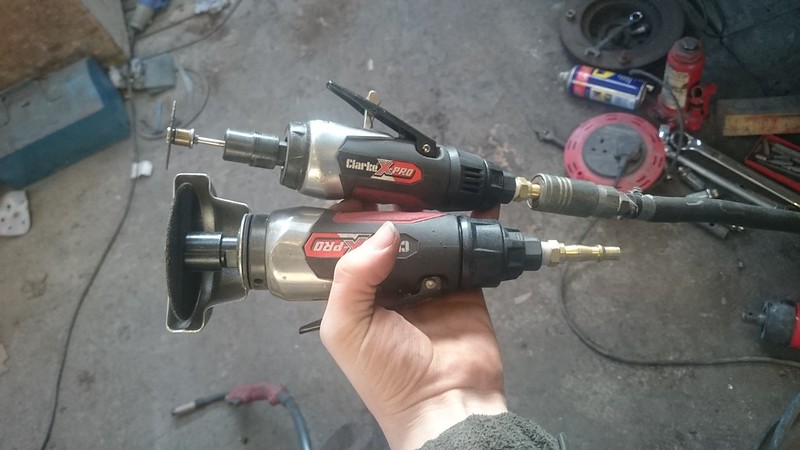 After many grinder burns later the first bit came out. I cant say i recommend trying to use a grinder in a space where its an inch away from your face. 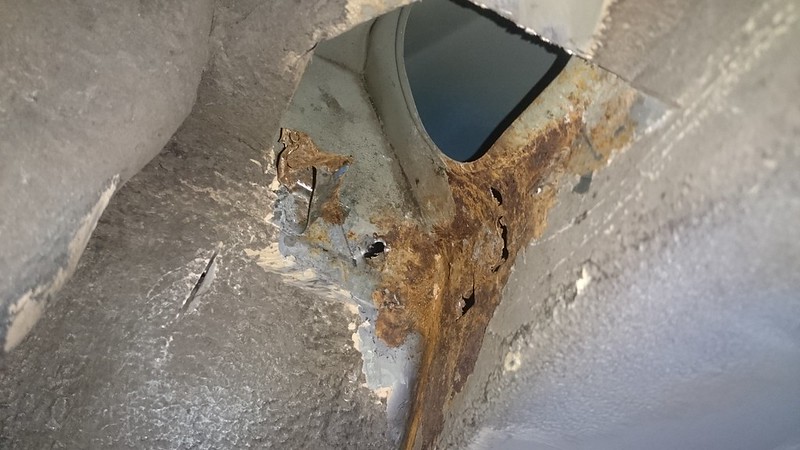 Hmm i was hoping that upright bit would have been ok, looks like I was mistaken. Out it comes aswell. 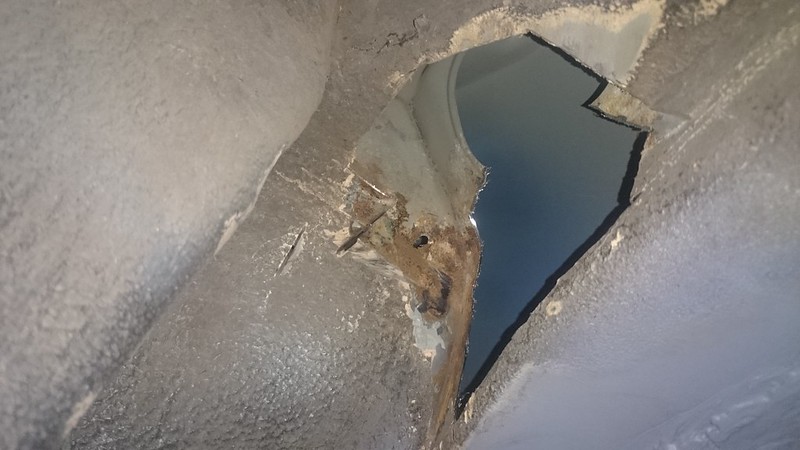 Replacement pieces made. 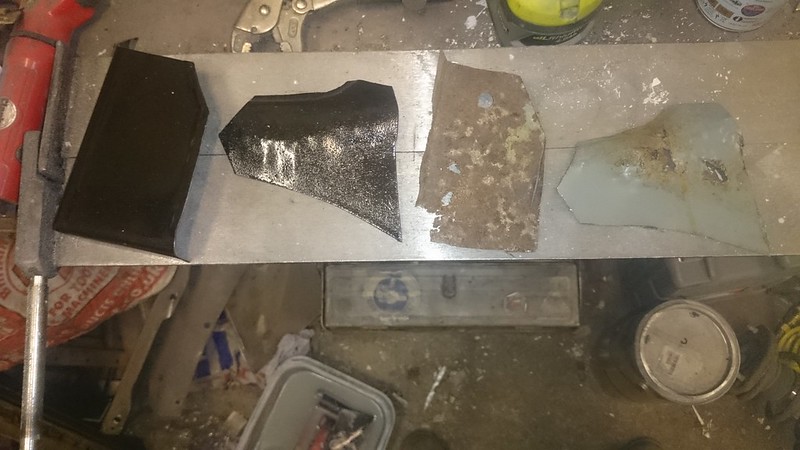 The flatter one (Base piece) still needs a little modifying to allow for drainage. In goes the first one, same problem with the welder that i had with the grinder but considerably more painful as i dont have full weld proof sleeves only a pair of gloves. 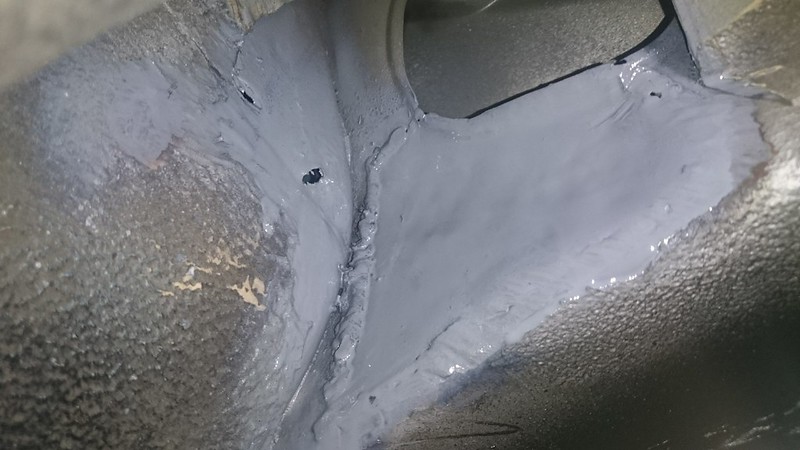 Ground back where possible and painted. Did some undersealing on the inner arch whilst i cooled off. 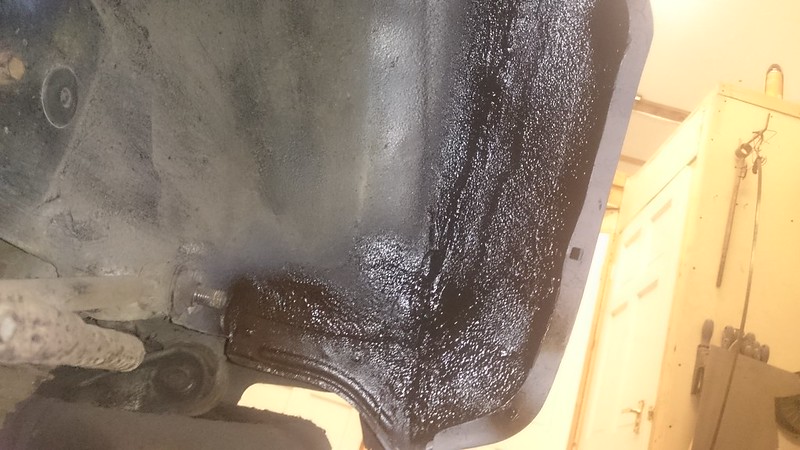 Maybe its just me but i love the look of fresh undersealer, Hey I never said i was normal. Something i have also been working on is these aluminium rails that hold the front splitter to the bumper.  They appear to react with the steel bolts and then break in half. My soloution 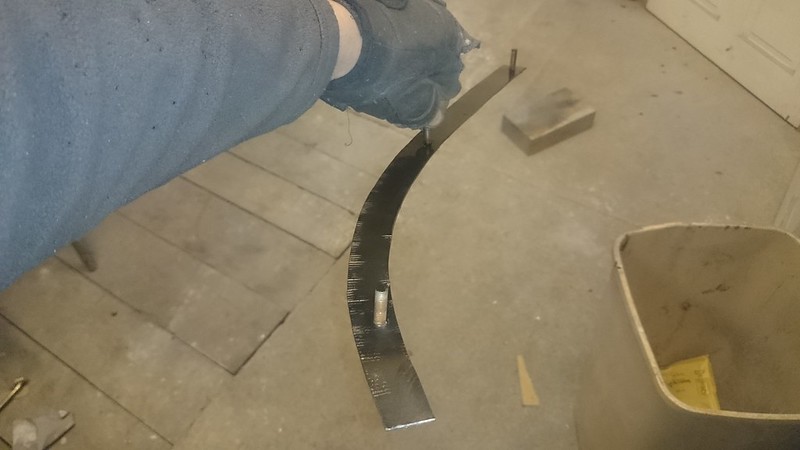 Its steel not aluminium but it should last. I have also had to have a look at my front "Toblerones" and rubbing strips 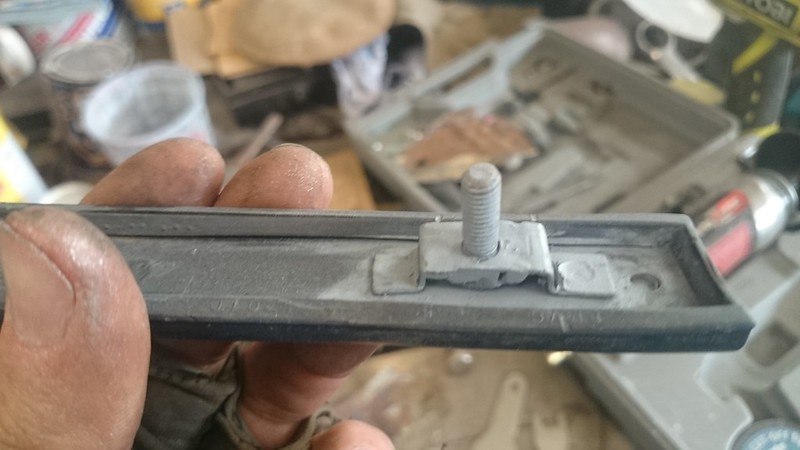 The original one snapped so i cut the bracket open, removed the old bolt, welded a new bolt in and welded the bracket back together *Not bad*. And the Toblerones. 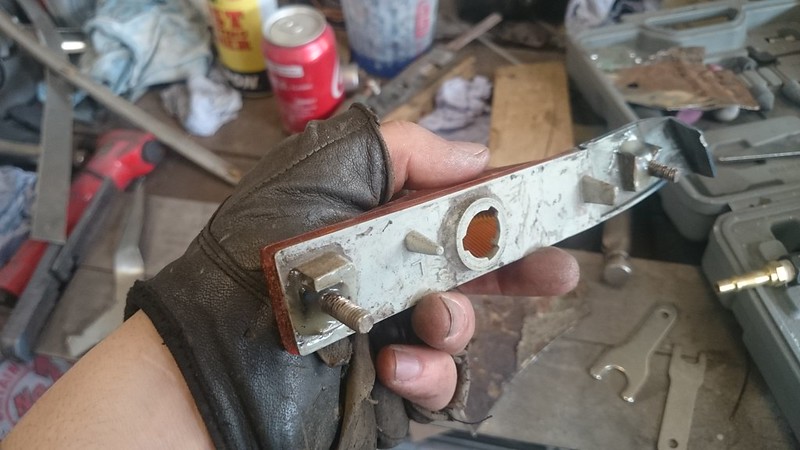 Same problem, the bolts snapped and broke the brackets, new bolts made and aryldite to hold it in place Bit more to go but i think i can see the light at the end of the tunnel, lets just hope its not some git with a flamethrower. |
|
|
|
Post by martin42006 on Sept 13, 2018 20:00:14 GMT
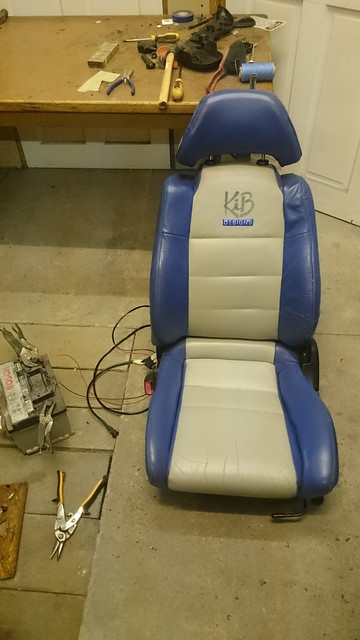
January 9th 2017 Im starting to think Sky has to realized that her retirement is almost over as she has started to bite back. I took of the lower suspension arms to paint and replace the ball joint as it was mentioned in the last MOT and im changing them all anyway. I have been steadily filling and rubbing down the sill whilst i do other things but not got any paint on it yet as its not quite there. I did get myself some new drive shaft seals as the old ones were leaking due to them not been replaced when Toyota changed the clutch a few years ago. They did replace a driveshaft and an engine mounting however due to "damage" :no: Anyway grumbling over, the lower plate got welded into the repair in the strut area and then the entire arch got undersealed. Drainage holes hammered in, 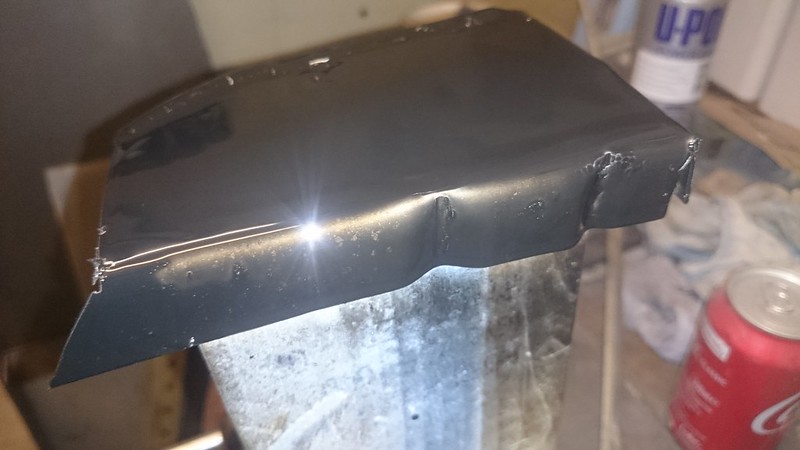 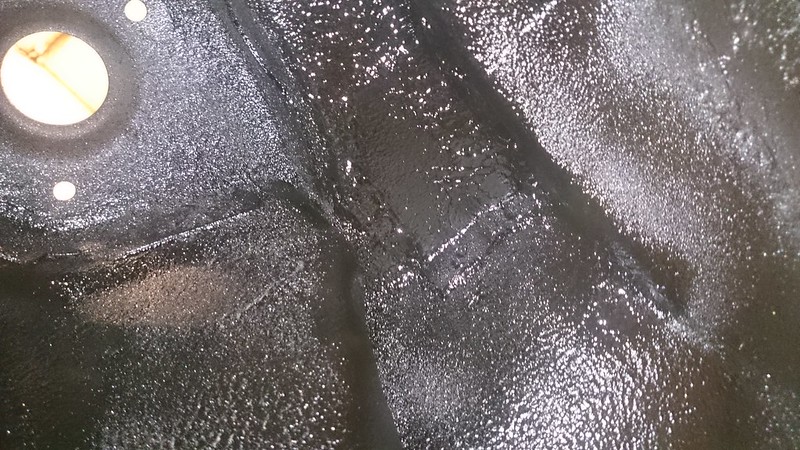 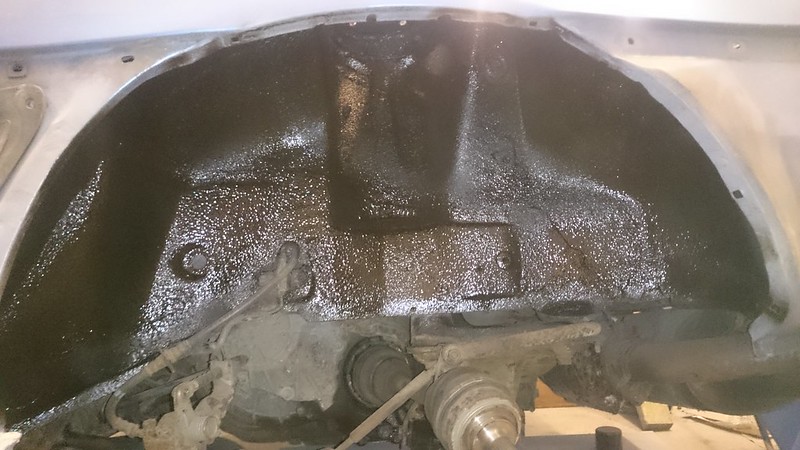 Whilst doing that i changed the driveshaft seal on the PS, will do the other side when access allows it. I have also been tinkering and replacing all the snapped studs on the rubbing strips So here are a few more photos of that process: First i used a slitting disk and cut the bracket open 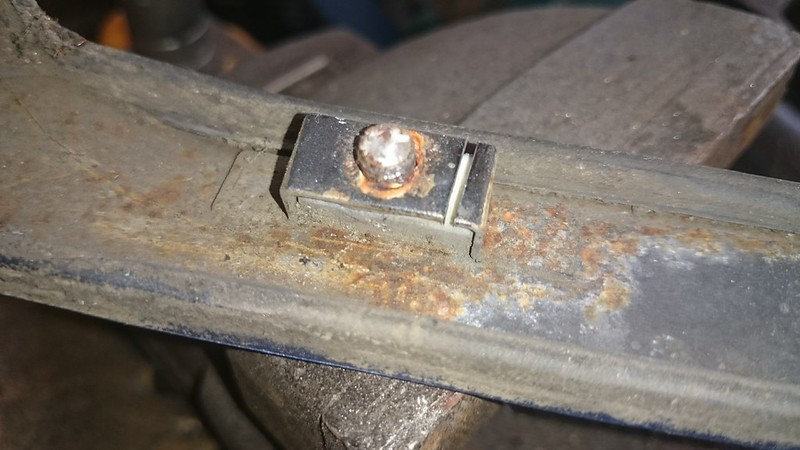 Then since the old bolt had been spot welded on i ground it off 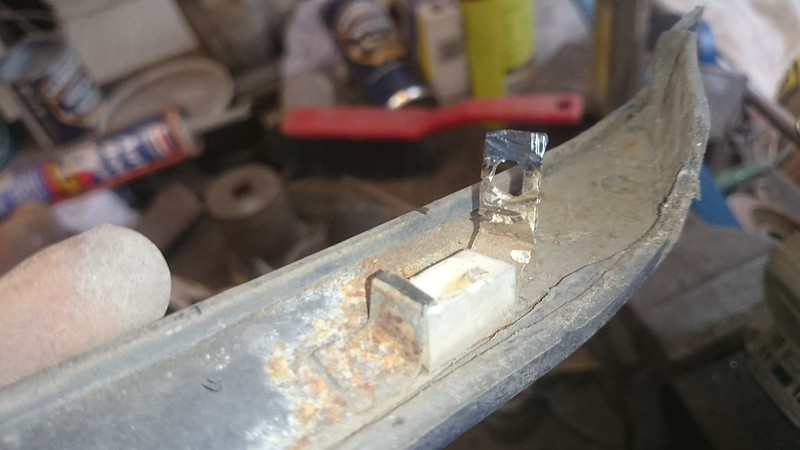 The new bolt can be put in place, it does require the bolt head to be flattened a little, once you have it flat, weld the bracket shut. 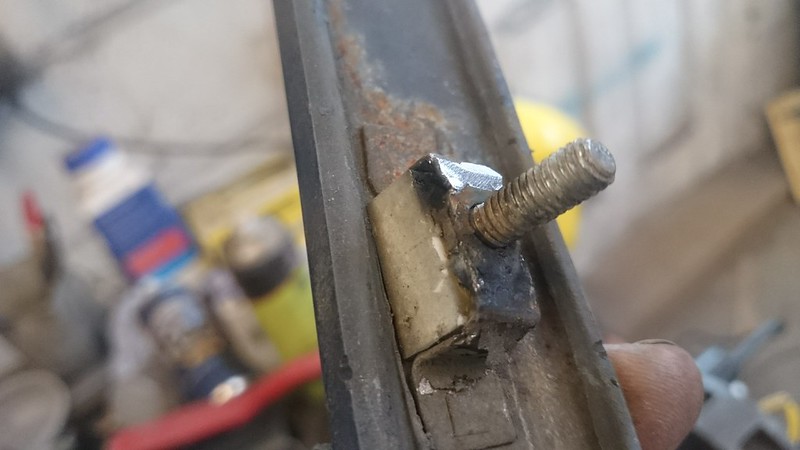 I then stick a little bit of rust inhibitor on it. The Toblerones, i had to make new bolts for, so using some 2mm steel i drilled and tapped a hole through a couple of squares of steel, thread some bar in and weld the bottom so it cant unwind then grind it flat. 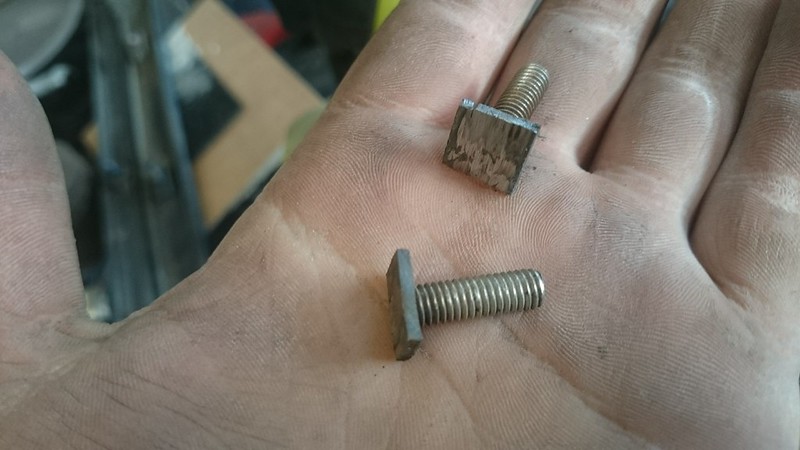 Then push them into the slots, it took a little tap with a hammer to get them all the way in as the hole is designed to hold the bar in place.  On these ones i ground the broken stud flat and drilled a hole large enough to take the replacement stud (I dont have a bottoming tap so they didnt get threaded) 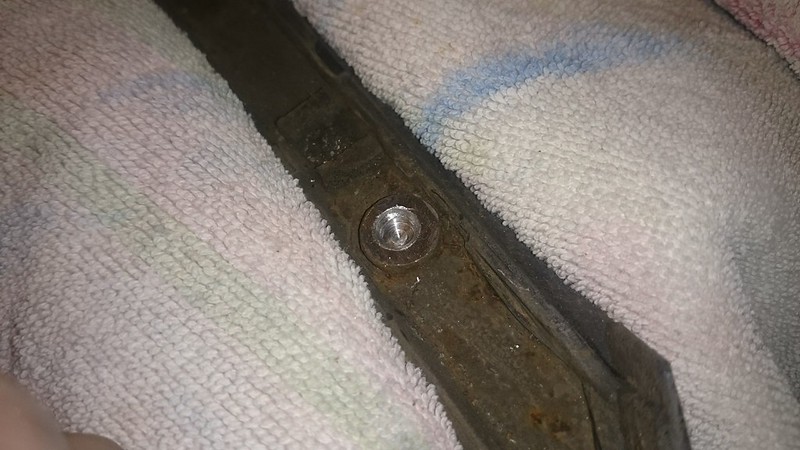 Put the new stud in place. 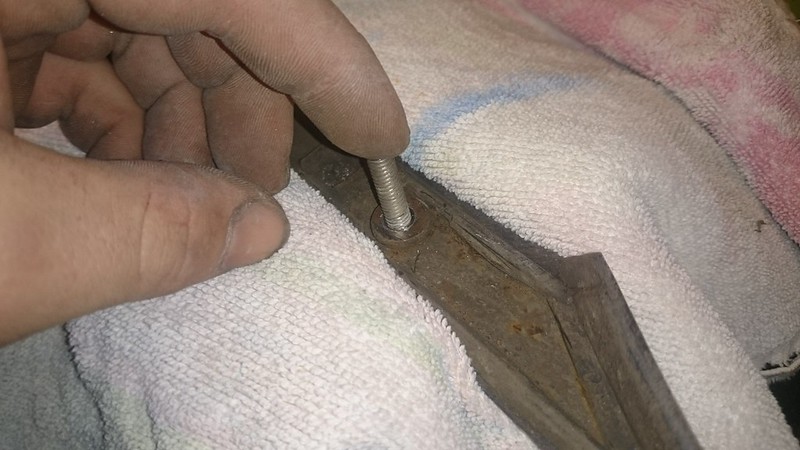 And welded 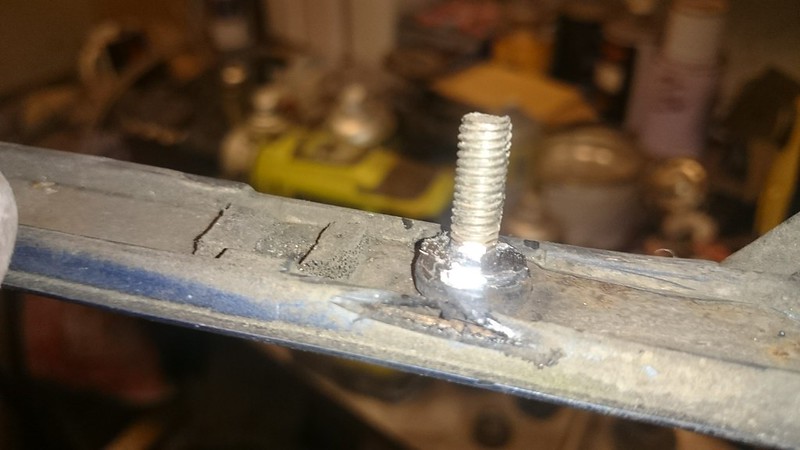 Slowly they are all getting fixed, once done im tempted to wrap/paint them silver to match the seats. Speaking of seats, i have ordered the heating pads, repair thread and a needle so watch out for that soon, the leather will be coming off to do the stitching. Will look at the speaker wiring tonight as someone has run new wiring to the front and back (underseat) speakers, wiring out the rear quarter speakers and the front tweeters. I will revert to the original loom and get an adapter for the strange Japanese radio connector. |
|
|
|
Post by martin42006 on Sept 21, 2018 21:36:59 GMT
January 12th 2017 Small progress update for ya, Since Sky has been excavated from the workshop temporarily i have decided to get cracking with the interior. Radio wiring was mentioned in my previous post so here it is. Start with a rats nest. 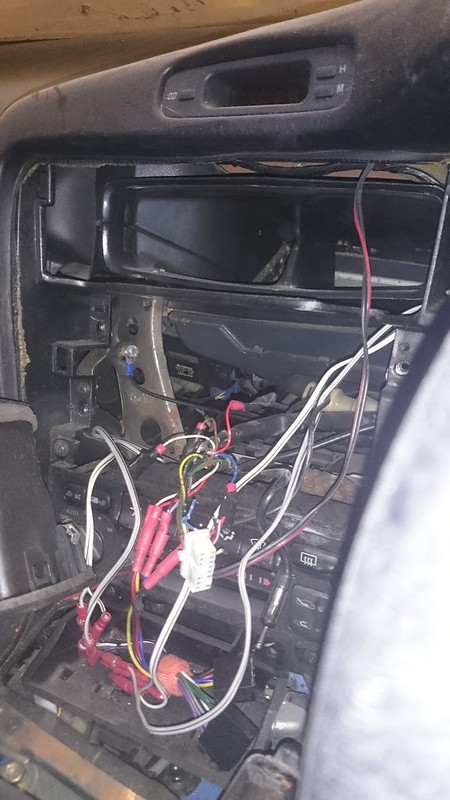 Bit of solder and heatshrink, and bam back to original. 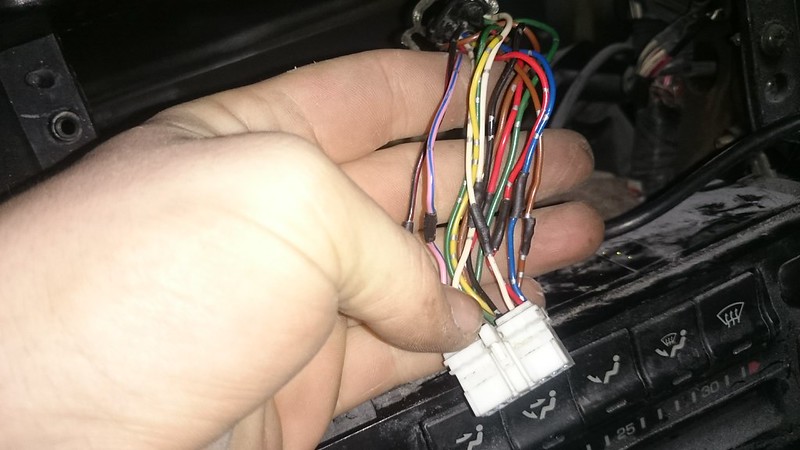 I have an adapter on the way for the old connector to new. Hopefully now all the original amps are wired back in we should have a reasonable sound system. Although the likely chance is that i will end up replacing some of the speakers. Nice surprise in the rear woofer boxes though 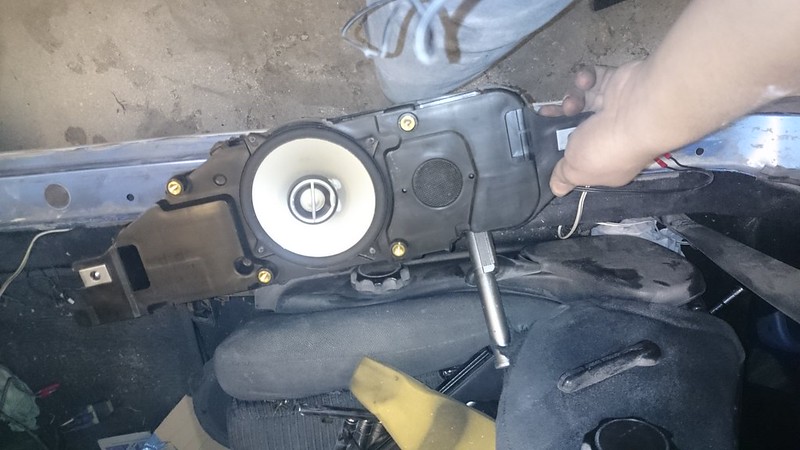 Seem like reasonable speakers so they will be staying in. What radio will i be putting is do i hear you ask, the current one is a decent sony so was a viable option till i noticed it only has RCA outputs for the rear amps and none for the front so that wont work. I could get a new modern head unit with all the jangling bells and whistles but that would require spending my hard earned pennies, so thats a no aswell. Bare with me because im about to go retro. This also came with the car 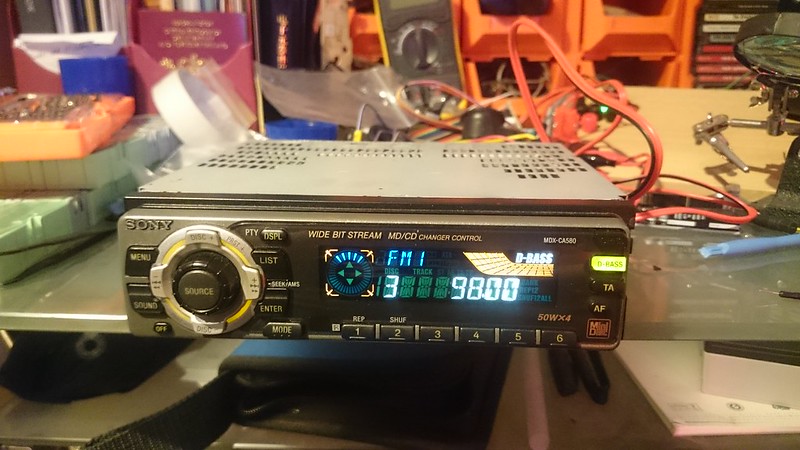 Yes its a rare creature called a minidisk player. It has all the required outputs for the system and it was free with the car, the previous owner (a friend from work) also mentioned something about having a "censored" load of minidisks to go with it. I have 2 issues now, 1. The "yellow" glow behind the buttons cant stay 2. All my tunes are on my phone As i may have mentioned before my specialty does not lie with bodywork but more with electronics. So i had a quick go at changing one of the surface mount LED's behind the dial. The result:  I only changed 1 of 4 as a test but the others will be changed shortly. I also have some other colours coming for behind the buttons. Something very usefull i found is a full set of wiring diagrams and board layouts for the aforementioned radio, this means i can find a line to hijack with an aux cable so i can connect my phone directly or possibly fit a BT module. I have found the correct lines out of the minidisk reader but currently it wont work as it doesnt think there is a minidisk in, some more pondering is required on this one. In other news my needles have arrived so i can start pulling apart the leather seats to do the stitching and fit the heating pads. |
|
|
|
Post by martin42006 on Sept 21, 2018 21:37:15 GMT
January 16th 2017 This weekend i got stitched up :rofl: To begin with it only looked like 2 small areas of stitching that needed doing, however one side split open pretty much as i toughed it. 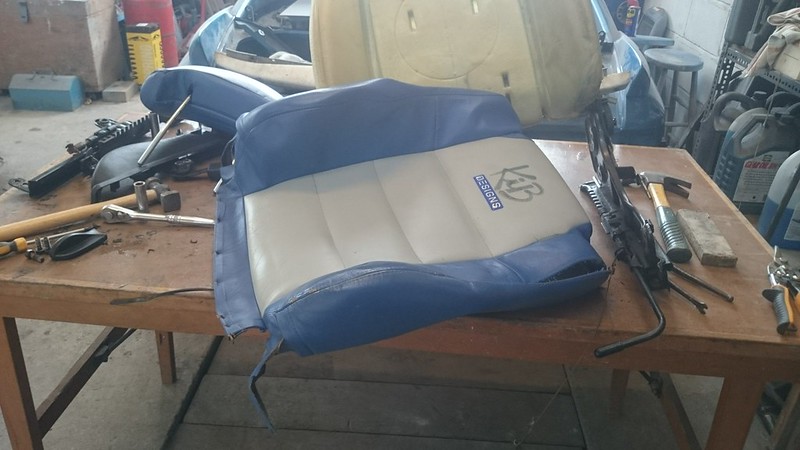 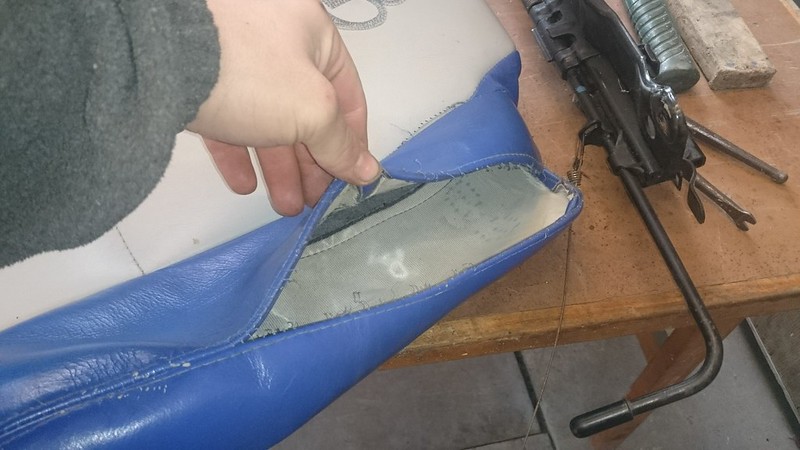 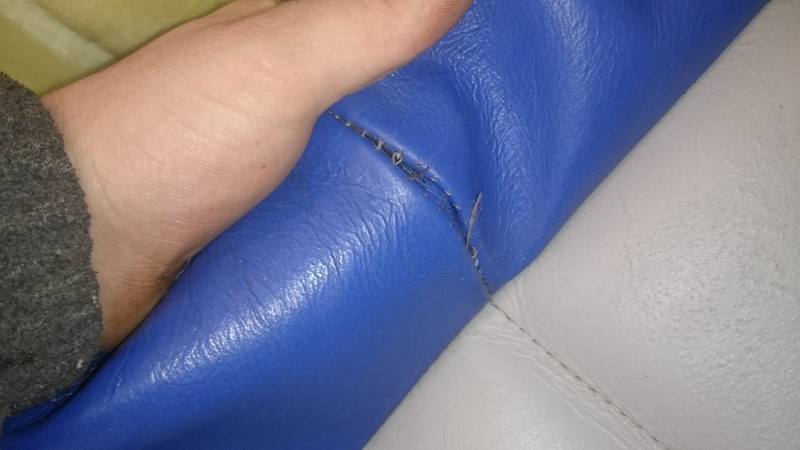 These are all the areas that required repair, the base's stitching was immaculate with just a little bit of work to do on the leather. 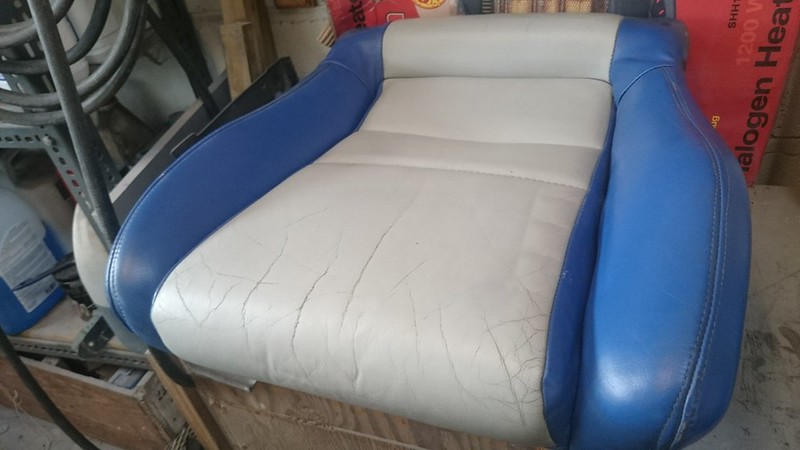 I did the stitching then just slipped it back over the seat to check all was still good, a little baggy at the top but i think it will pull down. 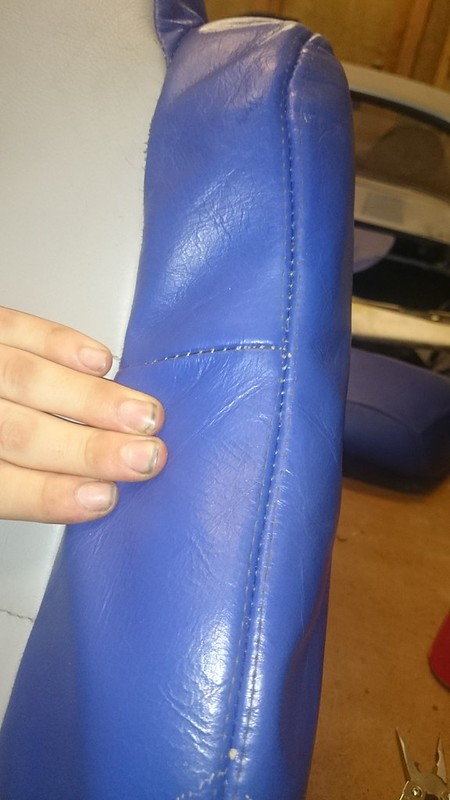 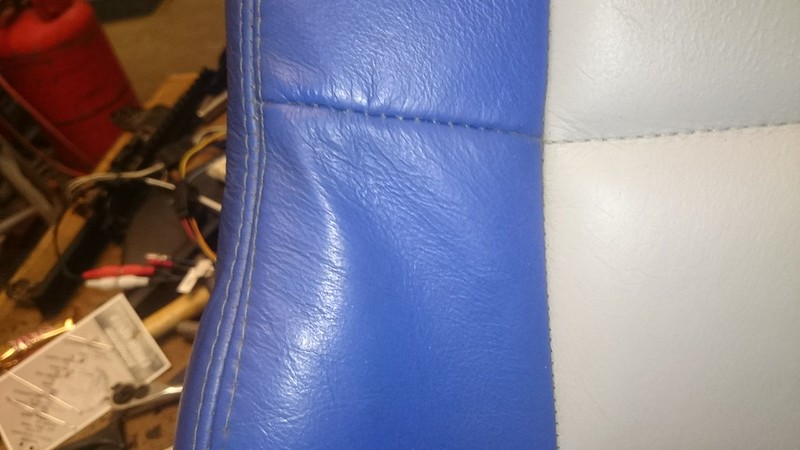 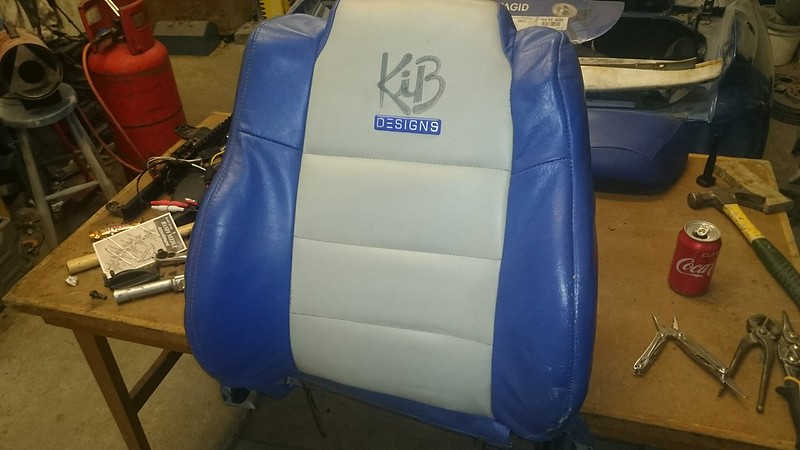 I also managed to snap 3 needles in the process (im still learning) but i think it looks good. Had a quick look at the heating pads, 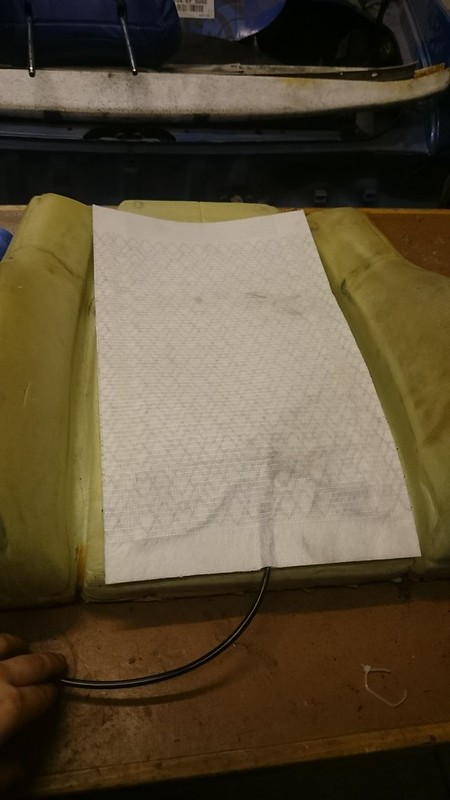 Looks like it will fit quite nicely, huh except that i need to be able to reattach the front of the seat cover which holds in place on the seat with 3 hog rings. 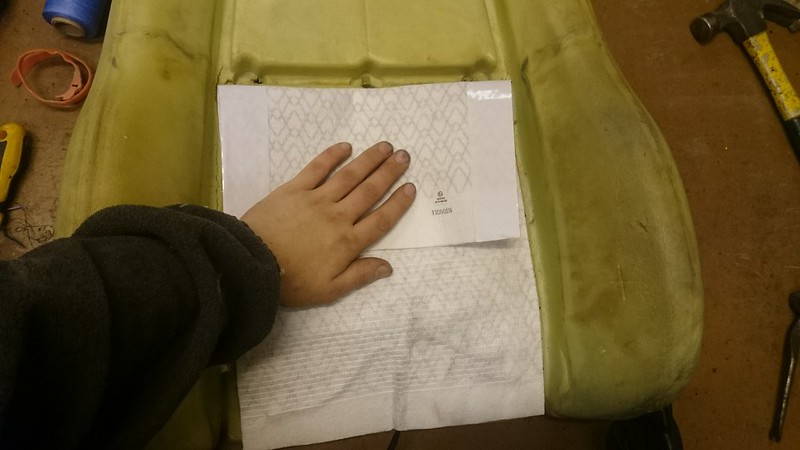 Since i bought carbon fibre pads i can cut them without to much worry but i will need to insulate the holes and rings as i dont think im quite ready for the electric chair. With regards to the radio i have had a change of direction as my new adapter came with a "deamplifier" cable which provides me with the extra 2 RCA ports required for the front speakers, i still intend on completing the other radio as i think it will be a great proof of concept for if i can get my hands on an original import radio. |
|
|
|
Post by manitou on Sept 22, 2018 9:26:17 GMT
|
|
|
|
Post by martin42006 on Sept 23, 2018 17:48:40 GMT
I cant draw, paint or do anything the could be remotely called artistic. |
|
|
|
Post by martin42006 on Sept 26, 2018 19:46:13 GMT
January 24th 2017
Yet another update for you wonderful people. I have spent the past week licking my wounds and doing small jobs. I finished up the stitching on the passengers side and fitted the heating pads. Tonight also saw the driver side seat partly disassembled. However most of my evenings have been spent playing with the heater controls. I started off by fitting some blue LED's to the switches, Begin by chopping the old LED's heads off, then just solder the SM LED's onto the legs. 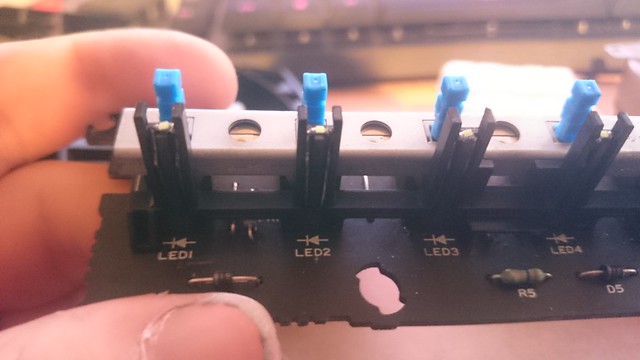 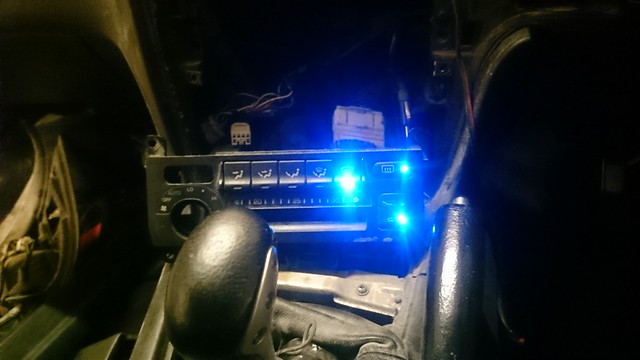 Yes they take after me, they are a bit to bright to be any good. I did add a blob of hot glue on top of them after to help diffuse the light and take the sharpness off. For the record i was using size 0603 surface mount LEDs which for anyone who knows anything about SMD's (dont laugh thats the technical term) they will know that its bloody tiny, but they are a sightly lighter blue and i had spare since i bought plenty for something else so might aswell use them. Also after spending flippin ages scrabbling around on the floor after any that i dropped i decided that they are never worth looking for and just to get another one out. Onwards, Lets go for a red back light that should be nice, 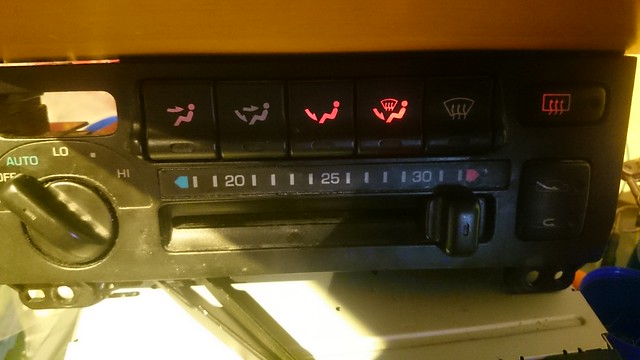 well that looks a bit pathetic its not reflecting to all the buttons, i did figure out the problem however. see here 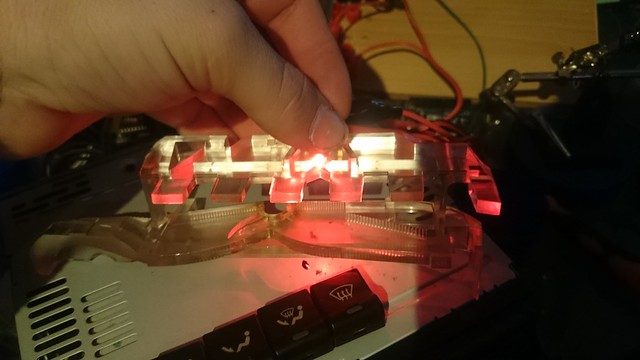 The led is to far forward to hit the reflectors for all the buttons to show up. I could possibly re-rig the led but i had a better plan as i have seen many people have uneven light levels coming from the buttons which i didnt want, yes yes i know thats possibly getting a bit to obsessive. So why dont we put an LED behind each button, sounds like a plan. 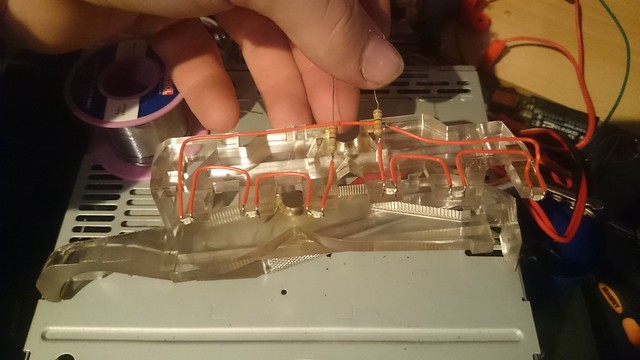 Here is what i came up with anyone who has taken one of these apart will see the problem that i had yet to notice. Thats right, the wires cant run over the top as there isnt any clearance :facepalm: Ah well, lets just cut groves and sink the wires down then glue in place. 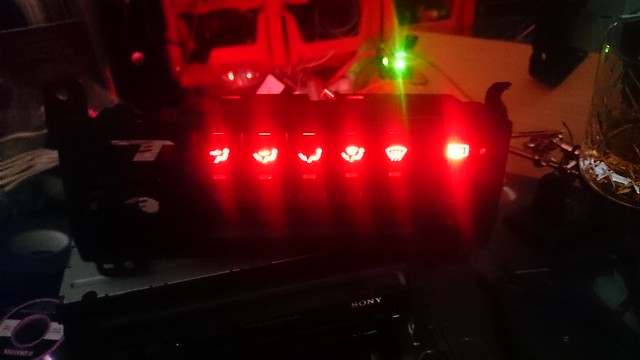 Hurrah that works, again a bit bright but LED's always look bright to the camera. Next is the temp control, i have seen something like this done before so feel free to pop up and claim credit. I wanted the gauge to start blue and then go red, so start with a strip of red LED's chop the silicone stuff off the top of the end two LED's.  Desolder them and solder in some blue ones, then replace the silicone and it should help to mix the 2 colours into a nice transition.
Hey Presto it works, the middle one looks purple. Attach them to the clear plastic lump and switch it on.  Next i did similar to the first set for the final few buttons and by the end i had something that looks like this when reconnected to the car. 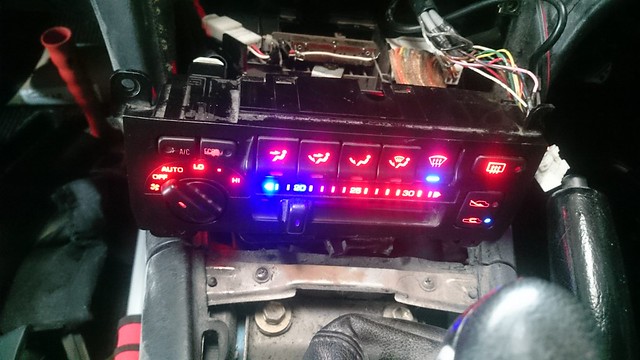 I like it, i also discovered a very cool second use for my lit up helping hand magnifying glass.
Yep it doubles as an epic coaster
The nectar you see there is a 16yo Lagavulin which was very kindly donated from a friend at work who found it a bit to peaty for his taste but refused to let his wife drink it with coke *thank goodness*.
So many thanks to him, it has kept my imagination running freely possibly a bit to much at times but hey.
Speaking off i need a refill.
SKAL :cheers:
|
|
|
|
Post by martin42006 on Sept 27, 2018 11:55:05 GMT
February 03rd 2017
This weeks update is a little late as i didnt want to update untill i had finished some stuff which i did last night. Much to the reluctance of my thumbs i have redone all the damaged stitching on both seats and fitted the heating pads whilst i was at it, happy to report they work and i havent inadvertantly created an electric chair. This included all the "detailing" stitching up either side of the main seam. It took a while but im happy with the result, will have more photos of that when i have finished refurbing the leather as it needs some attention with leather filler and dye. 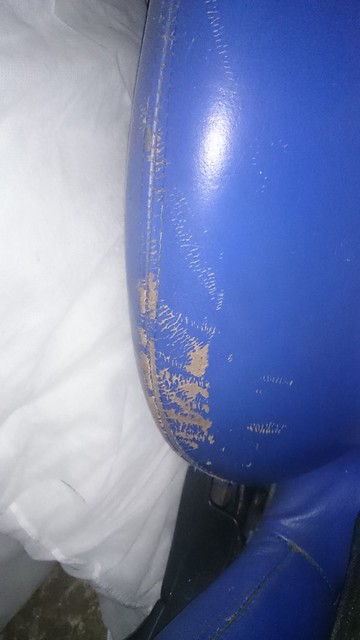 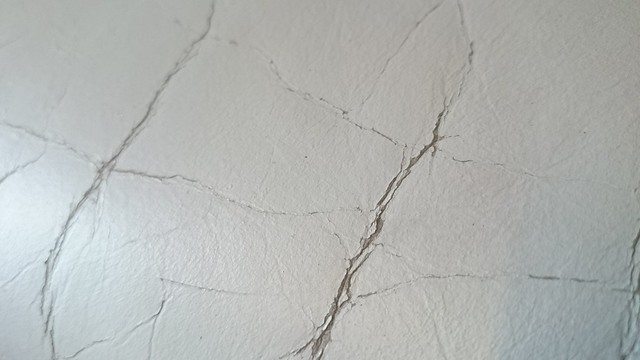 I also decided that it was past time to have a proper go with my new spray guns now that im pretty sure we know what the problems were caused by (Many thanks go to @abovetherim) So the side and sill was prepped, Filler and etch primer 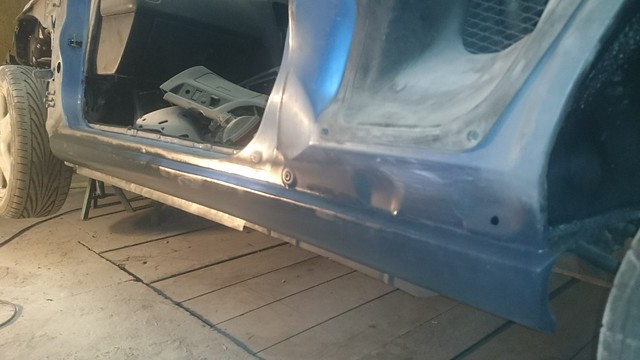 Primer 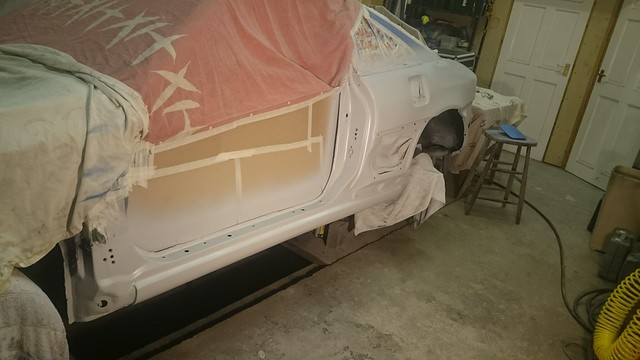 and colour, look ma' no reaction 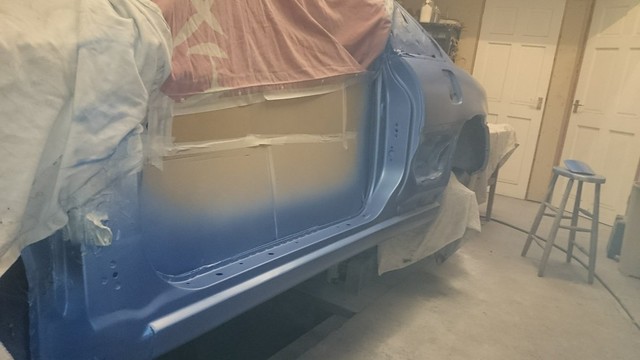 So yes you do need hardener in the filler primer, think i will read the instructions better in the future and pay less attention to my ole' man. I did manage to get a rather large run in the colour coat but i was to happy to care. I will rub the run out and give it another quick coat before lacquering tonight. Some lacquer did manage to get splashed onto a few bits though. 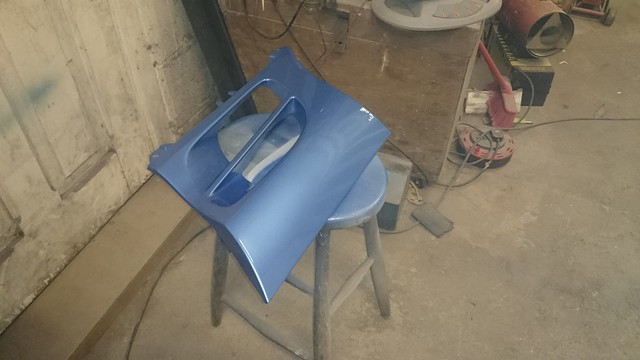 Im very happy with how they have come out although i still need practice setting up the gun for the different coats as it isnt going on very flat but will settle if you get enough on, hence how i got a large run. I also received a bit of pipe yesterday so i can finish off the exhaust pipe. So i think the current list of things left to do before the MOT is approx: Weld and fit Magnex exhaust Fill and respray the front bumper Repair the PS door Fill the indicator hole in my replacement PS front wing and paint Finish repairing the seats DS drive shaft oil seal and refill gearbox oil Refit interior Refit all external trim, bumpers, lights, ect... And Book the MOT Maybe only a couple more weeks work :th: |
|


 .
.