|
|
Post by byrney1984 on Sept 18, 2018 18:15:44 GMT
I should do really. It’s just small minded idiots. I’ll find out who it wqs eventually. Anyway heres a small post Had chance this morning to look at my heads. The outcome is what ever is in the bores is also stopping the valves from closing. Its like grit. So I’ll strip them down and re-seat the valves just incase. But whilst looking at cylinder head stands. I thought stuff it I’ll make a pair. So I turned a 3 degree taper, 65mm long on two lengths of 16mm round bar.  The cut them to 205mm long  Followed  by centre drilling a 7mm hole and tapped to M8. Chopped some 6mm x 25mm stainless flat bar to 345mm  Then just folded the ends 90 degrees at 60mm to form the feet and mounted the taper bars 30mm in from the ends. I’ll upload a picture of the finished stand in the morning because I forgot to take one. Saved myself £20 and had a bit of fun doing it. |
|
|
|
Post by byrney1984 on Sept 19, 2018 9:40:00 GMT
And here is the finished product. Not bad I don’t think.  |
|
|
|
Post by byrney1984 on Oct 7, 2018 17:33:50 GMT
Managed a good 5 hours in the beast today. So I made some progress well heart sinking progress. Got my new bottom end up on the stand. To make life easier and I still can’t believe it only cost £27 delivered. I couldn’t make one for that price.  Excuse the Dutton phaeton rear end. Then lifted up the old black beast and dropped the knackeres lump out   Just stripped anything of use and surprisingly the crank is in excellent condition as are the rods. Pistons are shot and the block too. So time to rebuild and check everything twice and not rush because the misses is moaning. |
|
|
|
Post by byrney1984 on Oct 7, 2018 17:34:15 GMT
Well it’s been a busy week or so. Started a new job and think 3 bloody family members car decided to break down. So after sorting all those out first then a few jobs on my landrover. I actually did a bit of work on the engine. Just bolted all the bottom end bits on I could. The oil pump which has been re-used from my last build as its a genuine Toyota one. Just needs a clean and maybe i I can be arsed a touch up with paint. Then cleaned all the crap out of the sump and sealed that on with a gasket and some sealer. Cheers for the gasket Pat.    Then thats as far as I got because I got dragged off to help the brother in law fix a water leak on his pinto engine. But rest assured I will have a complete engine again by Saturday night. Well hopefully lol. |
|
|
|
Post by byrney1984 on Oct 7, 2018 17:34:51 GMT
Here’s a picture I forgot to upload of my cylinder heads stands in action whilst stripping the heads ready to be skimmed, valve seats lapped and new stem seals fitted.  |
|
|
|
Post by byrney1984 on Oct 12, 2018 13:28:13 GMT
Finally got my heads back from the machists. They have been nicely skimmed and I have had all the valve seats re-cut. It was worth using these heads and getting all the work done because I had already spent hours porting the sodding things. 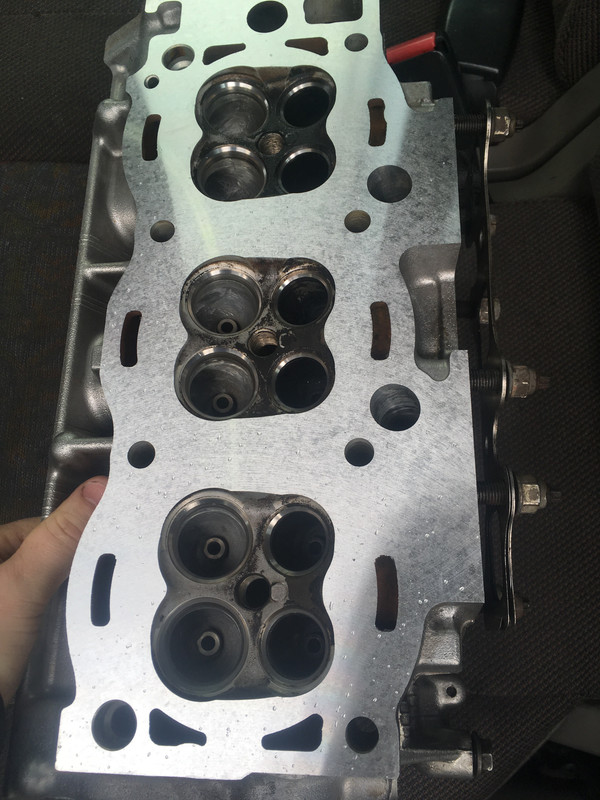 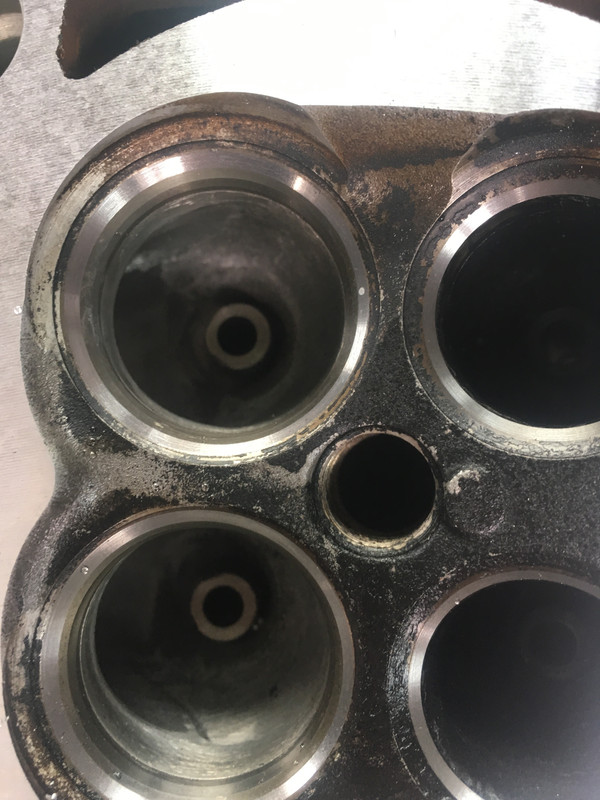 A bloody good job again by Eammon the machist( ignor the few rain drops) Only charged £80 too. I would highly recomend his services to anyone wanting any sort of engine work in my area. Just need a quick bit of a clean to remove any carbon build up then the valves lapping in. Hopefully by tomorrow I will have a fully built engine again ready to go back in. |
|
|
|
Post by byrney1984 on Oct 13, 2018 17:29:39 GMT
A bit more done today but no where near as much as I would have liked. Mainly because of messing around with the brother in laws kit car and watching him re-trim some Rover P6 seats. Makes it look so easy but with an awesome outcome. Anyway heres where I am so far Pulled out the old valve stem seals very carefully. 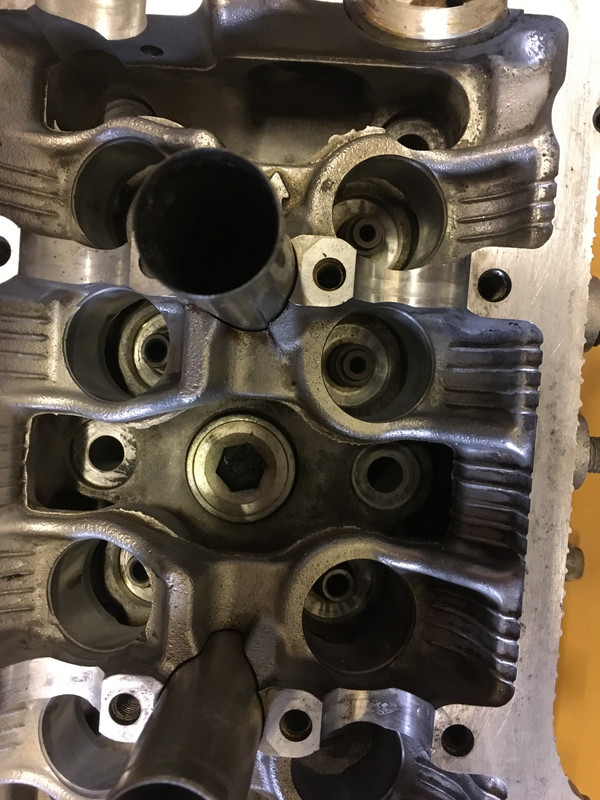 Installed the new ones, I find a 12 pointed 9mm socket holds them just nice and pushes them on nice and easy 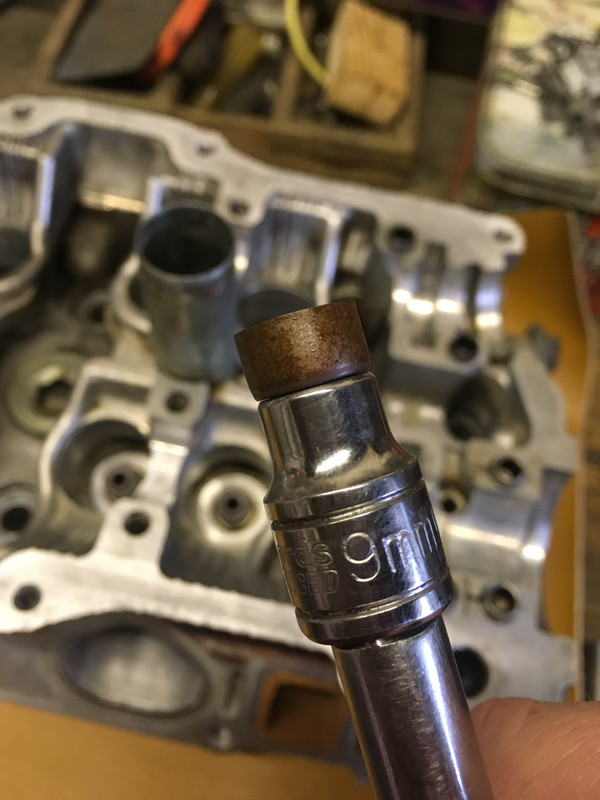 Once all 12 were in I lapped my valves to make sure of a perfect snug fit. Then set about installing the valves back in order. 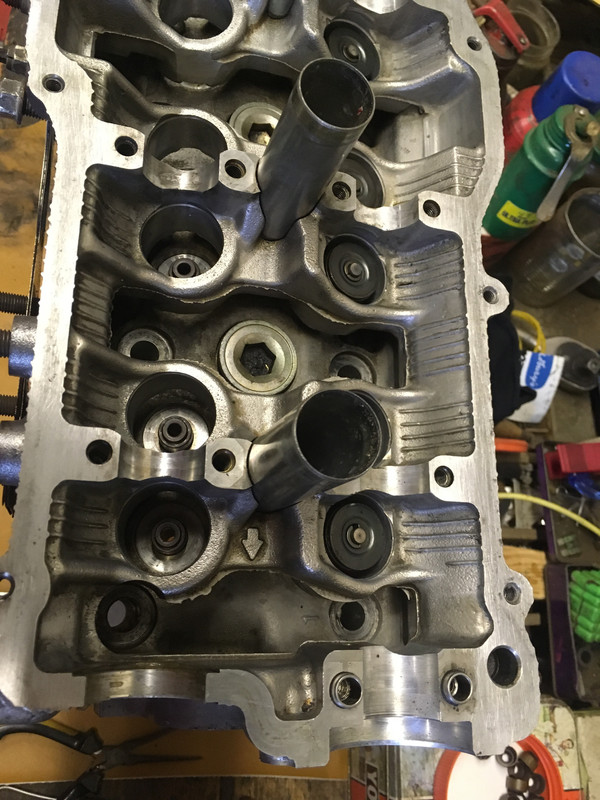 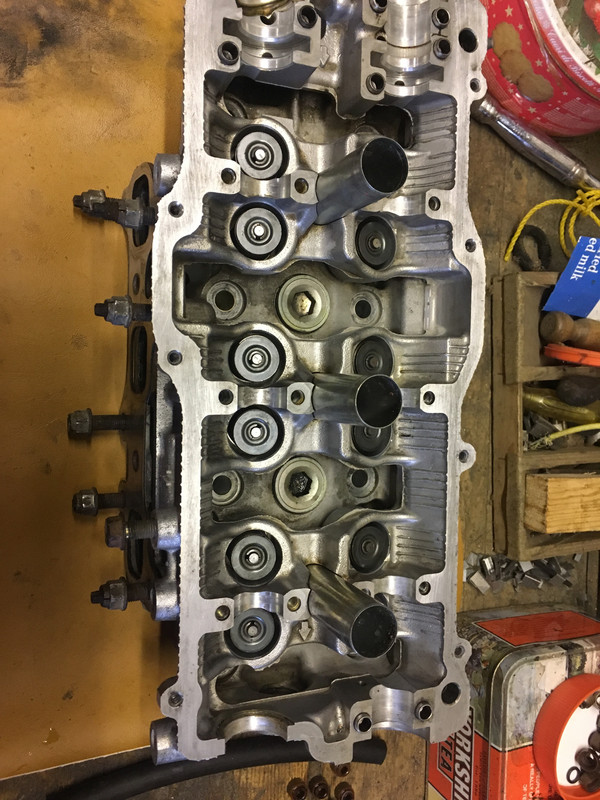 Once all installed I thought I’d stick it on the block. Seeing as it looks better on the block than the bench. So grabbed my Victor Reinz head gasket making sure to get the correct side. As one has an extra hole and one side is blanked off. Went to place it on the block and disaster. I noticed cylinder head location dowels were missing. I can’t belive I hadn’t noticed earlier. So I had to find a way of removing the dowels from my old block without causing any damage to them. After a brew and a stand back. I decided to tap a M12 x 1.75 thread on the inside. 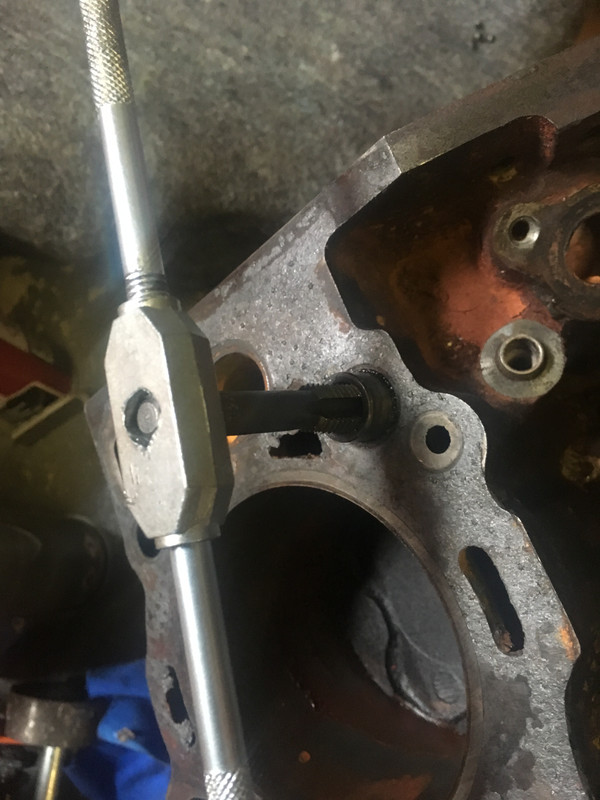 Then wind a bolt in with a couple of lock nuts on to make the dowel spin 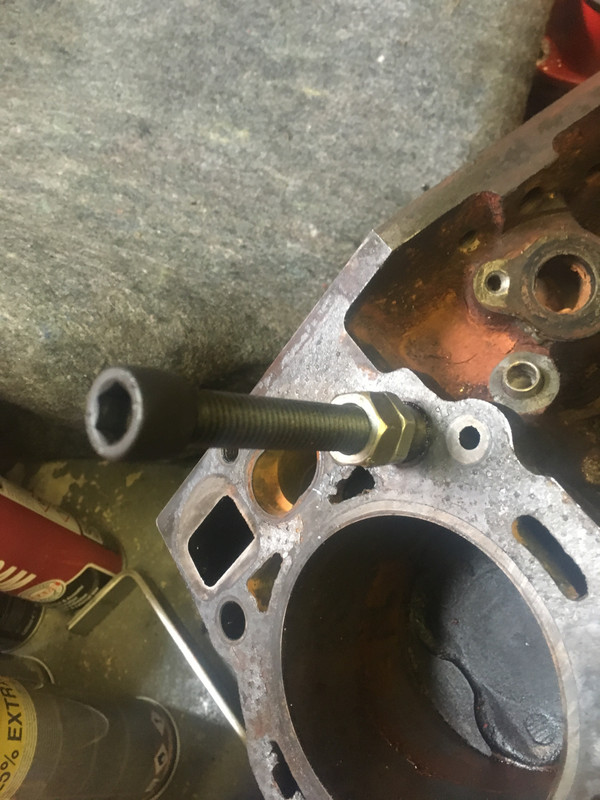 Then I just put a spanner under nut and pushed it up whilst rotating the dowel. Thankfully it popped up and out easy enough. 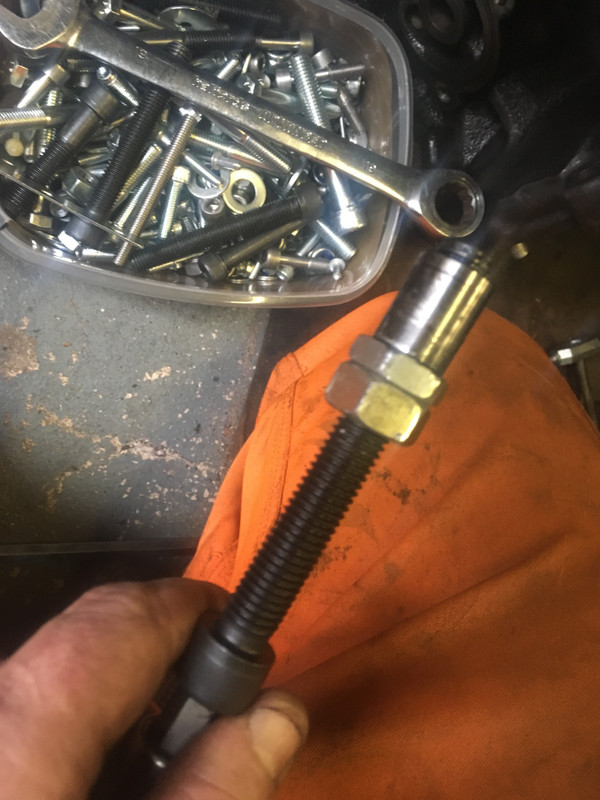 I just repeated the process for the other 3 dowels. To remove the dowel from the bolt I clamped it in the vice using some soft jaws and unwound the bolt. Gently tapped them in my new block and hey presto all good. Installed the head to check fitment and jobs a good one. 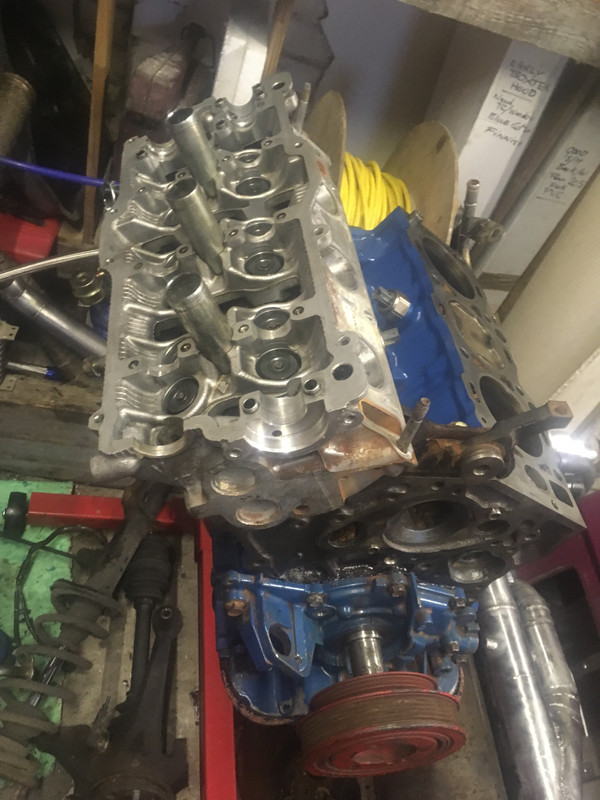 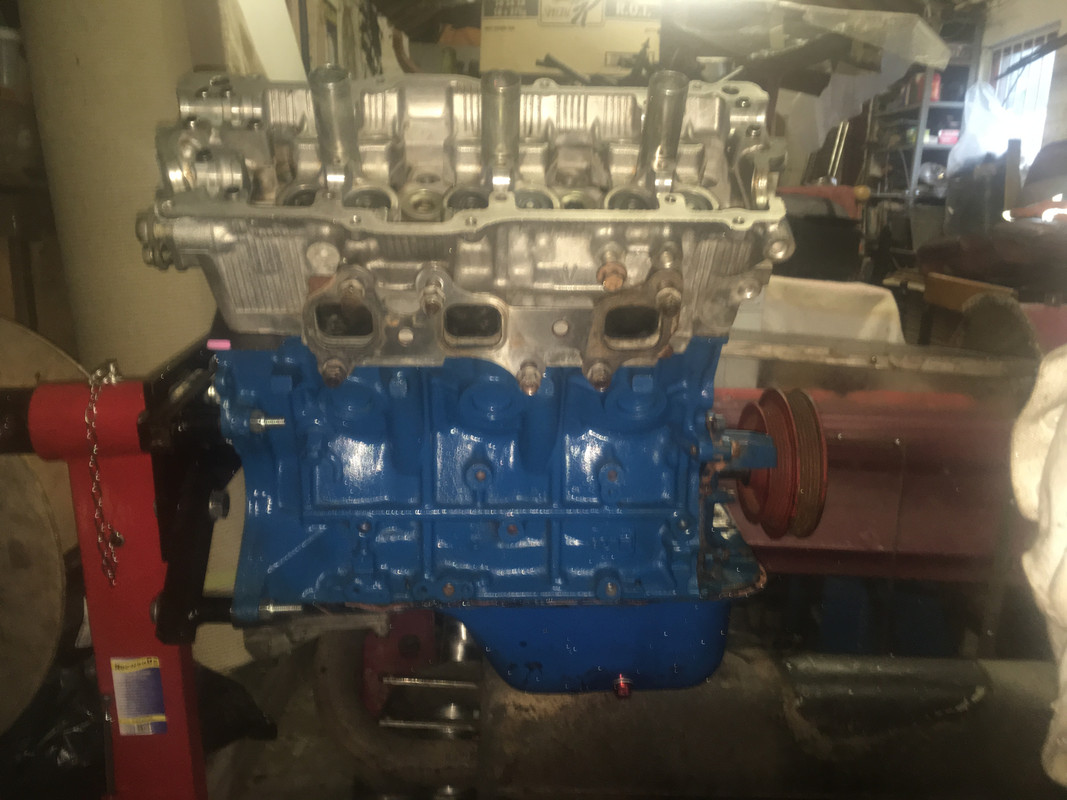 Hopefully this might help someone in the same predicament as me. Unless there is an easier way to remove the dowels without damaging them. If so I’d love to know just for future reference. Its taking a while but I’m making progress. All be it at the speed of an asthmatic any with some heavy shopping. But progress is progress i guess. Stay tuned.... |
|
|
|
Post by byrney1984 on Oct 14, 2018 16:27:50 GMT
Well I was allowed a bit more time down the workshop today. Managed to lap and rebuild the other cylinder head. And get it fitted. Heres a picture of the headgasket in place. 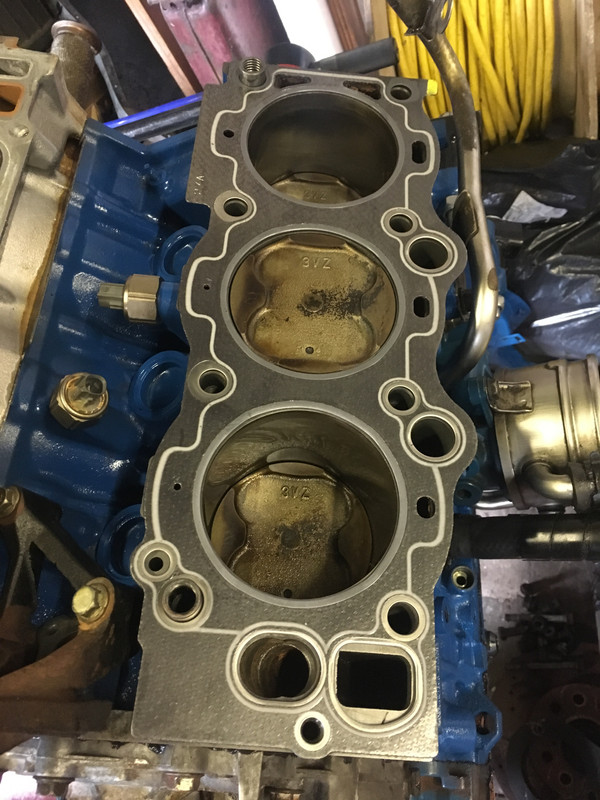 Then followed by the head 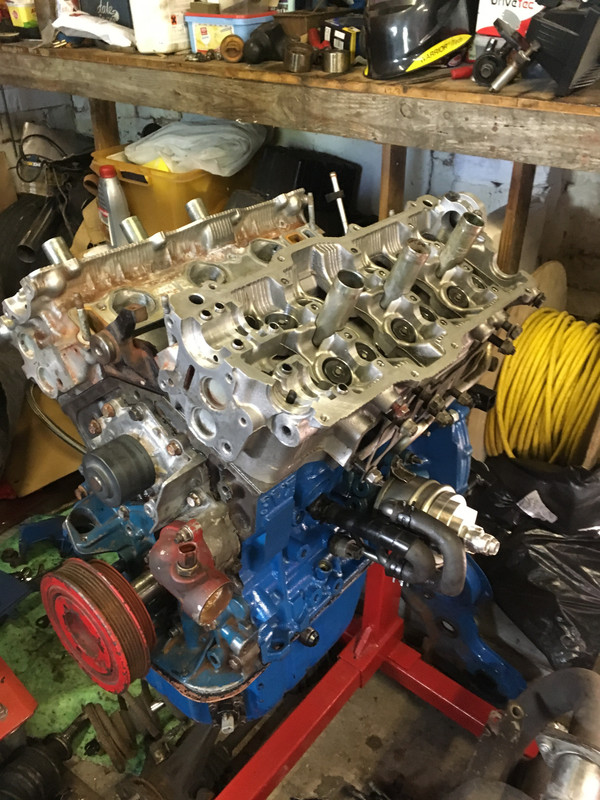 Then installed the knock sensor harness. The connectors tend to go brittle so I blobbed a bit of silicone on them for good measure.  Also cleaned and fitted the waterpump. I’m re-using my one from the knackered engine as its only been on the engine for 12 months, plus its a genuine toyota part. Hopefully next week I will have the engine complete. Biggest ballache will be making sure of the correct gaps between cam lobes and valve buckets. I have 48 shims so hopefully I should have enough to make full set. I’m just not sure how deep the valve seats were cut. Do its a case of fit measure and refit. Then I can repaint what needs painting again. |
|
|
|
Post by byrney1984 on Oct 20, 2018 17:16:52 GMT
Well its Saturday again so update time lol. Not a great deal of progress as I sold my pitbike to some young lads. So I spent most of the afternoon making sure its was running and stopping right. Although 3 of them and a bike in a corsa was a funny sight. I have now fitted all the buckets and camshafts  Timing marks all lined up.  Then had the joys of checking the clearances. Exhaust is 0.27-0.37mm and intake is 0.13-0.23mm.  I have had to do this because I have had all the seats re-cut so now the valves will sit slightly higher. Plus I didn’t bother to number the buckets/shims. Mainly because I would have to check the clearances anyway. On the right head a few were within spec but the rest have to come out and be swapped around.  The other head was the same. But I did however have enough shims to make a full set within the tolerances given in the workshop manual. So here it is as it looks now hopefully tomorrow I’ll sneak off and get the rest bolted on and maybe timed up   |
|
|
|
Post by cdwood2010 on Nov 7, 2018 1:28:51 GMT
This looks such a nice clean build! Well done sir!  |
|